Enable ZenCAM PLUS as a Gateway for ZenBEACON
Introduction
Setting up ZenCAM PLUS as a gateway for ZenBEACON is a simple and efficient way to enhance asset tracking within your fleet. This integration offers several key benefits:
Automatic Connection/Disconnection: ZenBEACON automatically connects and disconnects to ZenCAM PLUS as needed, streamlining the process.
Seamless Integration: If your fleet is already using ZenCAM PLUS, this configuration is quick and easy to implement.
One-Time Setup: After the initial setup, all future ZenBEACONS will automatically connect to the ZenCAM PLUS, saving you time and effort with no additional configuration required.
This guide will walk you through the steps needed to set up ZenCAM PLUS to serve as the gateway for ZenBEACON, ensuring smooth and continuous asset monitoring.
 Requirement: Must have ZenCAM PLUS, not ZenCAM LITE
METHOD 1: ZenduONE Platform
4. Click Edit in Device Settings section
METHOD 2: Troubleshooting and Camera Settings Method
Part A: Log into camera settings
Download the Veyes app from the App Store or Google Play.
Verify that:
The camera is powered on.
The SIM card is inserted. If SIM is not present, then insert the SIM and Repower the camera.
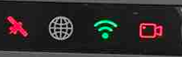
Wait for Green Power and Green Wi-Fi for ADAS/LITE or red for ADP.
Connect to the camera’s Wi-Fi. (Ensure connected to camera 003F or 00D2 or 00710).

Launch the Veyes application.
Ensure you are connected to the camera’s WiFi.
Enter the login credentials:
For the credential access you would need to contact support@zenduit.com +1 (855) 936-3848 x 2

Login
Part B: Enable Bluetooth in camera settings
Refer to this video for guidance on the following steps.
Navigate to Config > Network > Bluetooth.
Check the box next to “Bluetooth”.
Check the box in the first row.
Click the menu on the right, then input “BC:57:29” as the MAC Address.
Hit “OK”, then make sure to “Save”.
The status should soon show up as “Connected”.
Now, all beacons within proximity of the camera will automatically connect.
Next Steps
Related Articles
Manage ZenBEACON with ZenduONE
Introduction This article will walk you through how to efficiently manage and monitor your ZenBEACONs after you’ve completed the setup and configuration on the beacon and gateway sides. Note: In order for beacons to appear in ZenduONE, you must meet ...Manage ZenBEACON with ZenduONE
Introduction This article will walk you through how to efficiently manage and monitor your ZenBEACONs after you’ve completed the setup and configuration on the beacon and gateway sides. Note: In order for beacons to appear in ZenduONE, you must meet ...ZenduONE User Guide
Introduction ZenduONE integrates both hardware and software components to deliver a comprehensive video telematics solution aimed at boosting fleet safety and efficiency. Through features such as real-time video streaming, event-triggered recordings, ...Change User from Driver to User in Zenduone
Procedure: Login to ZenduCAM Navigate to Admin Click on Users Click on Drivers: Click on Edit: Enable/Disable the Driver Option: Click on Save:ZenduONE Rule Types
Introduction This table provides a comprehensive overview of all system rules available in ZenduONE. Each rule is broken down into the following columns to help you better understand and utilize them: Rule Type: The name of the rule. Description: A ...