Import Scheduled Maintenance
Overview
Scheduled maintenance activities can be imported using CSV files only (comma-separated values). Each scheduled maintenance can be imported with single or multiple tasks, or with a task list. Multi-asset scheduled maintenance can also be imported. This procedure demonstrates the import process.
The general plan for uploading a scheduled maintenance list is as follows:
- Save a .csv file using the specified format.
- Upload the .csv file using the import tool.
- Manually set the triggers for each scheduled maintenance.
- Manually set the scheduled maintenance to active.
The general import process is demonstrated first. Specific .csv file examples for complicated imports are documented toward the end.
A general import of scheduled maintenances:
The following example demonstrates how to upload two scheduled maintenance actives, one for each of the two different assets. Save a .csv file using the specified format. A .csv file can be created using a spreadsheet application. Excel and OpenOffice are two common examples.
1. Create a .csv file with the following headings in consecutive columns as shown:
SM Code,Asset Code,SM Description,Task Desc,Date Created,SM Status,Priority,Maintenance Type

- SM Code = The scheduled maintenance code
- Asset Code = The code (or name) of the asset for which the scheduled maintenance should apply. These are stored in the asset records in your CMMS.
- SM description = The general description for the Scheduled Maintenance
- Task Description = The task to be done
- Date Created = The date that the scheduled maintenance was created (must be in format shown in the picture)
- SM Status = The status for the scheduled maintenance. Options include "Open", "Closed" and "Assigned"
- Priority = The priority for the scheduled maintenance. Options include "Highest", "High", "Medium", "Low", and "Lowest"
- Maintenance Type = The type of maintenance. Options include the maintenance types specified in your CMMS.
2. Now, fill in the details for each scheduled maintenance activity. Under each heading add one row for each scheduled maintenance plan to be uploaded.
Note: None of the columns are required fields. You can leave a column blank for any scheduled maintenance if information is not available. The data can be entered manually later.
3. Save the .csv file. In excel, and other spreadsheet programs, you will need to change the file type to .csv.
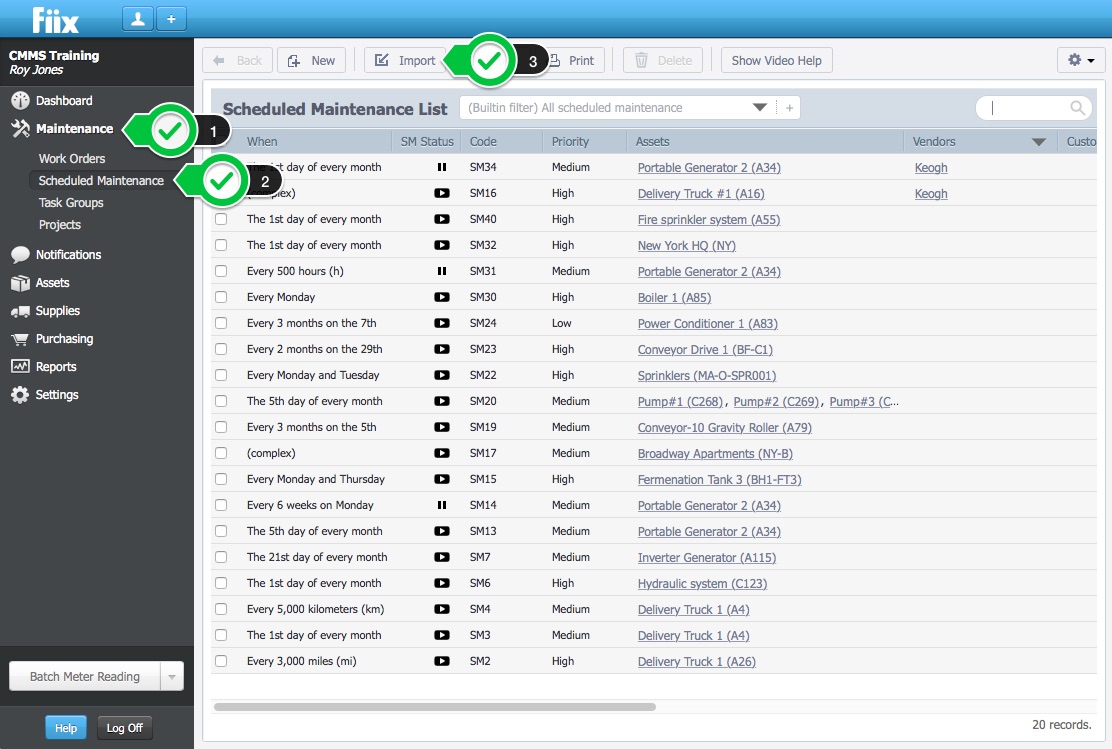
4. Upload the .csv file using the import tool. To do this, click Scheduled Maintenance, and Import
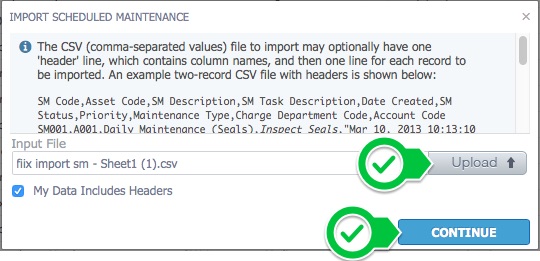
5. Select the .csv file, and click Continue
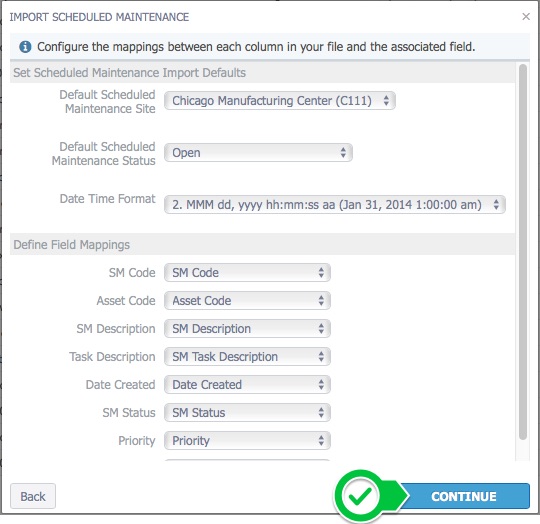
6. There are a number of items that need to be selected before completing the import including:
- Site - With the multi-site feature enabled, you will need to choose the site that the Scheduled Maintenance belongs to. You cannot import a Scheduled Maintenance that includes two assets in two different sites.
- Default Maintenance Status - Choose your Status, Requested, open etc.
- Date/Time Format - There are nine formats available to you.
- Define Field Mappings - Match these headings with those in your .csv file
Once satisfied, click Continue
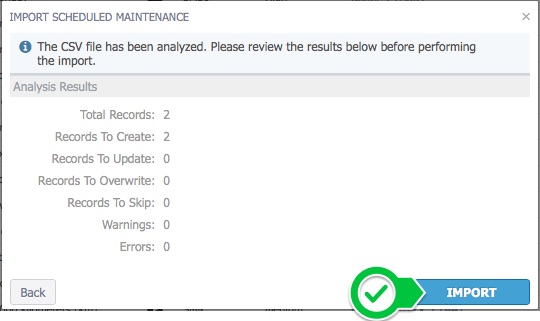
7. You will be met with the following pop-up where you can review your import. In this case we are creating two new records. Once satisfied, click I mport . Your import will now take place.
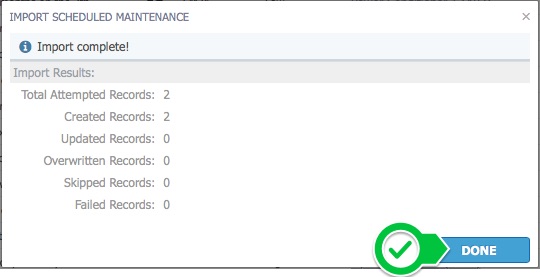
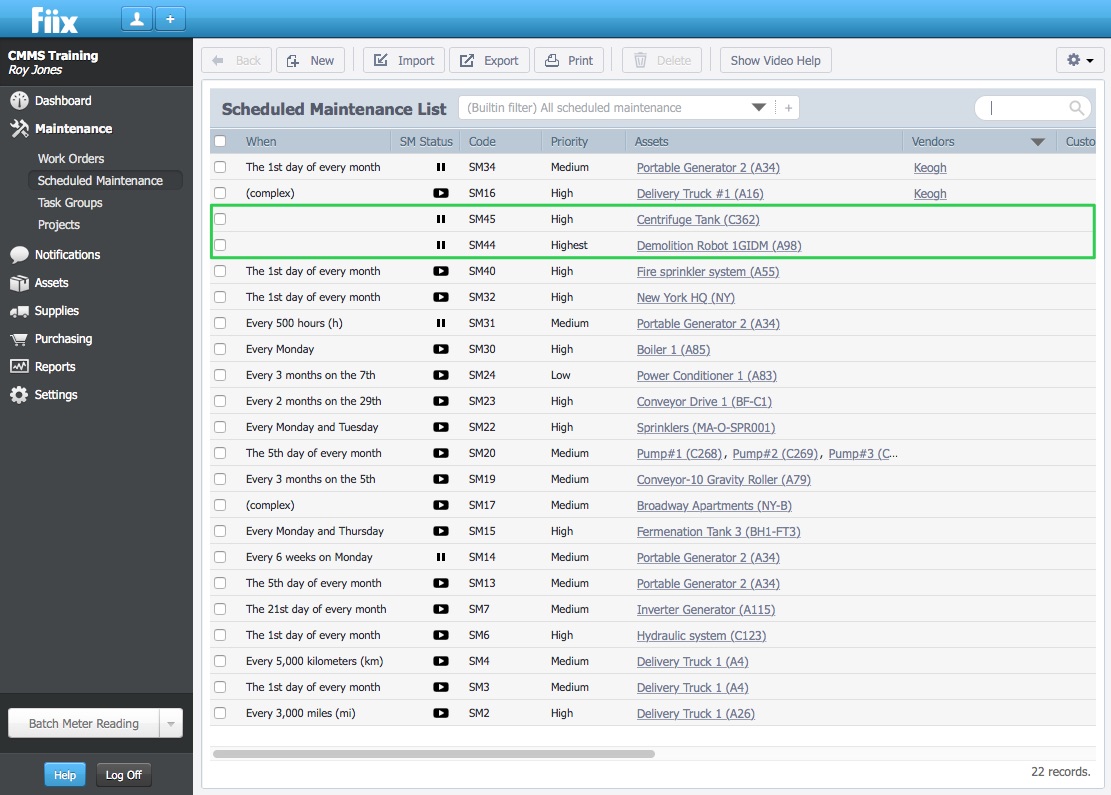
8. Once finished, another pop-up will appear that reviews what has taken place. In this case two records have been created. Click Done, and your Scheduled Maintenances will now be displayed with any existing Scheduled Maintenances.
9. The next step is to edit your scheduling trigger, and activate your Scheduled Maintenance. More information on how to achieve this can be found by reading the article titled Create a New Scheduled Maintenance
Import a Scheduled Maintenance with Multiple Tasks:
To import a scheduled maintenance with multiple tasks, create a csv. where all of the information is identical including the SM Code, Asset Code, SM Description, Date Created, SM Status, Priority, Maintenance Type, except for the Task Description .

Scheduled Maintenance for Single Asset with Task Group import:
- Create a Task Group in your CMMS.
- Instead of a Task Description header use Task Group
- Under the Task Group header, insert the name of the Task Group. In this example it is called Weekly PM
- Once you have your .csv file in order, follow the steps outlined above.

Multi-Asset Scheduled Maintenance:
To import a multi-asset scheduled maintenance, create a .csv where all of the information is identical including the SM Code, SM Description, Task Group, Date Created, SM Status, Priority, Maintenance Type, except for the Asset Code .

Note:- The import has multiple error checking features:
- If you specify an asset that does not exist, it will create a new asset with that name
- Any data that is not provided can be filled in at a later date manually
Related Articles
ZenduMaintenance - Excel template to import data
Templates Please refer to the article link below, which contains all of the templates: Data import overview Also, we would suggest importing just a few records at first to make sure that everything works out as you have intended, and only then import ...ZenduMA - Scheduled maintenances not visible in the list of assigned work orders -
Procedure: When a scheduled maintenance trigger is activated, a work order is generated. However, If the Start As Work Order Status is not set to an active control, then the work order will not show up in the list of assigned work orders. The example ...Replacing existing Geotab device with the old work orders and scheduled maintenance tied to the new Geotab device
This article illustrates the step-by-step method of Replacing the existing Geotab device with the old work orders and scheduled maintenance tied to the new Geotab device. Steps 1. log in to Geotab 2. click on vehicles 3. select the ...Multi Asset Scheduled Maintenance Imports
Overview This article demonstrates how to create a multi-asset scheduled maintenance using the import/export tool. Note Multi-Site Users: You can only import multiple assets that are located at the same Site. 1. Click Assets, expand the hierarchy, ...Step 4: Create a Scheduled Maintenance
Overview This procedure outlines the steps necessary to create a Scheduled Maintenance for an asset. In essence, scheduled maintenance is a template for work orders. When the right conditions are met (a certain amount of time has elapsed, or a meter ...