ZenduMA - Setting up user groups
This article will explain how to create a new user group:
Creating a new user group can take time due to the number of menu and page permission options. To save time, work from a user group that is close to what you need and use the copy function. For example, if you want to create a user group with slightly less access than managers, copy the managers group, rename it, and then remove the items you don't want this group to have. It is a lot quicker than starting from scratch!
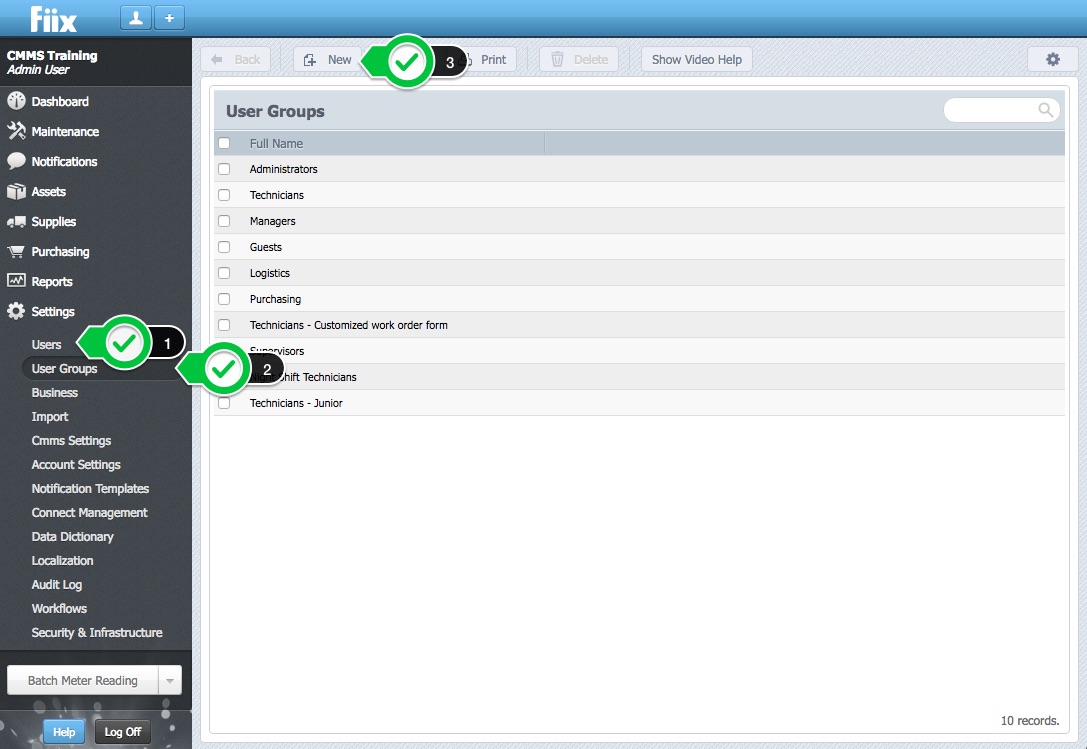
1. Select Settings, User Groups and New
1. Users tab
The Users tab will show any any users who you assign to your newly created group. As this is a new group there are currently no users to display. You will add users to your new group through the individual's user account.
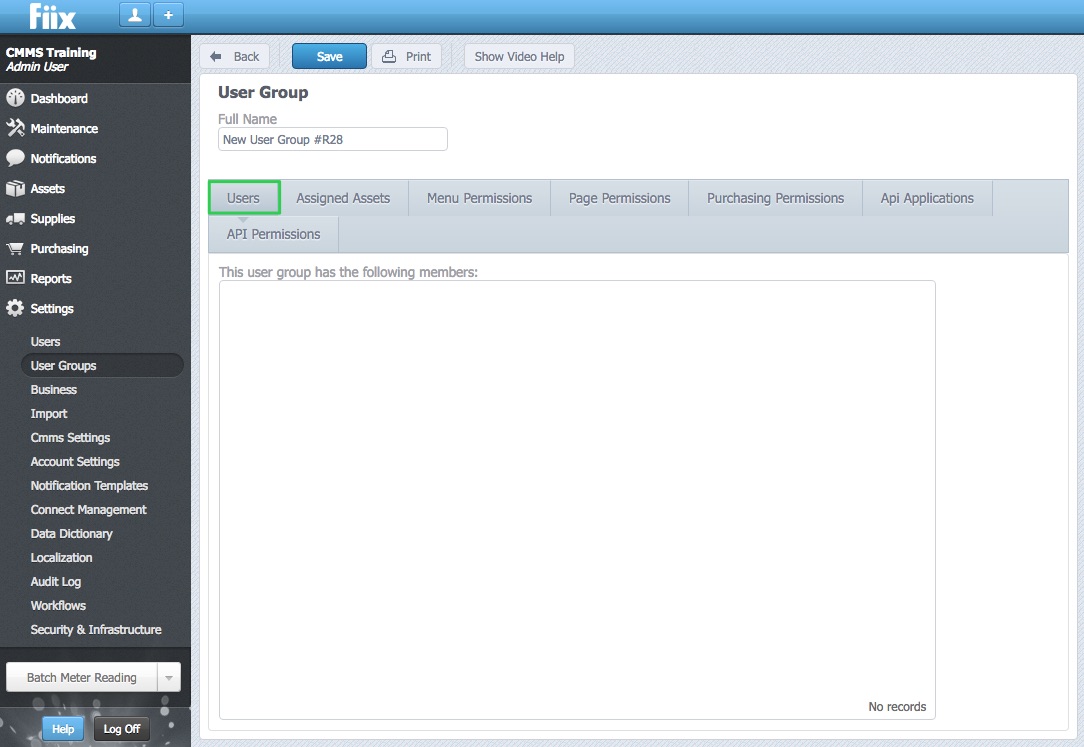
2. Assigned Assets
The Assigned Assets tab will show any assets in which the user group is assigned to. To assign a user group to assets you will need to assign them through the actual assets.

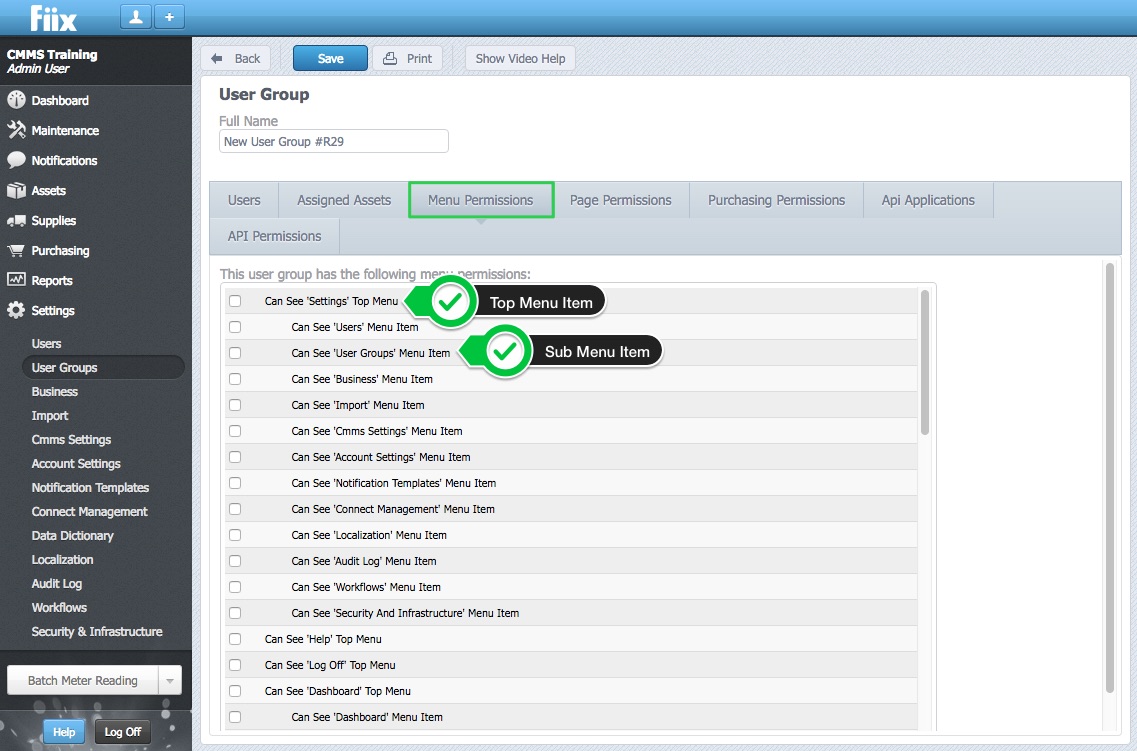
3. Menu Permissions
This determines what the users can see in the in the left menu. For some users such as shift supervisors, it may be advantageous to give them permission to add new equipment, staff or parts to the system. For groups like Human Resources for example, they only need access to the Add New Users tab.
Each of the headings in the Menu Permissions tab reflect an option listed on the left, however just selecting the top menu item for Dashboard for example will not allow access to the items such as calendar etc. that are listed below the Dashboard once it has been expanded. In the attached screenshot the Settings Menu Item is highlighted.
You will notice the indented menu items below settings. Choosing the top menu item will not allow access to the sub menu items, you will need to select the desired options from the list.
This principle is the same for all menu Items, Dashboard Maintenance etc. You will have to set these according to your specific requirements. You will need to set your page permissions accordingly too. These page permissions will be covered below.
4. Page Permissions
Page permissions go into the finer details of what the users can do when on particular pages. There are a large number of Page Permissions so extreme time and care is needed when setting these permissions.
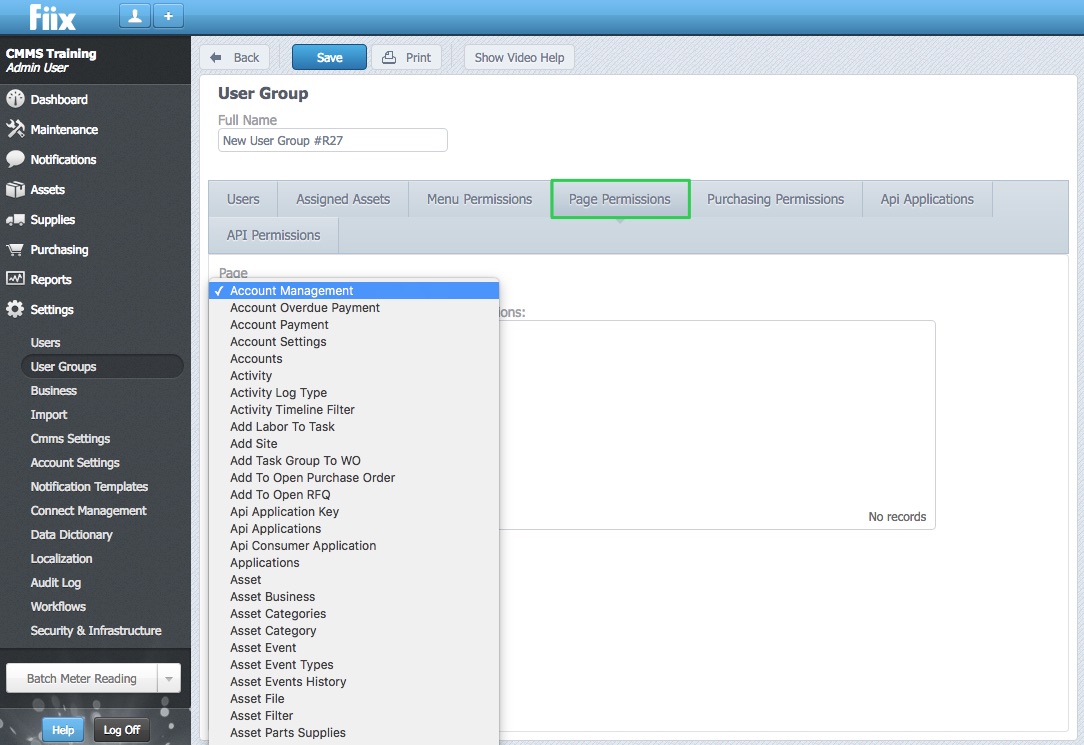
Below is a screenshot showing the Work Orders page permissions as an example. You will need to select the required options and click Save.
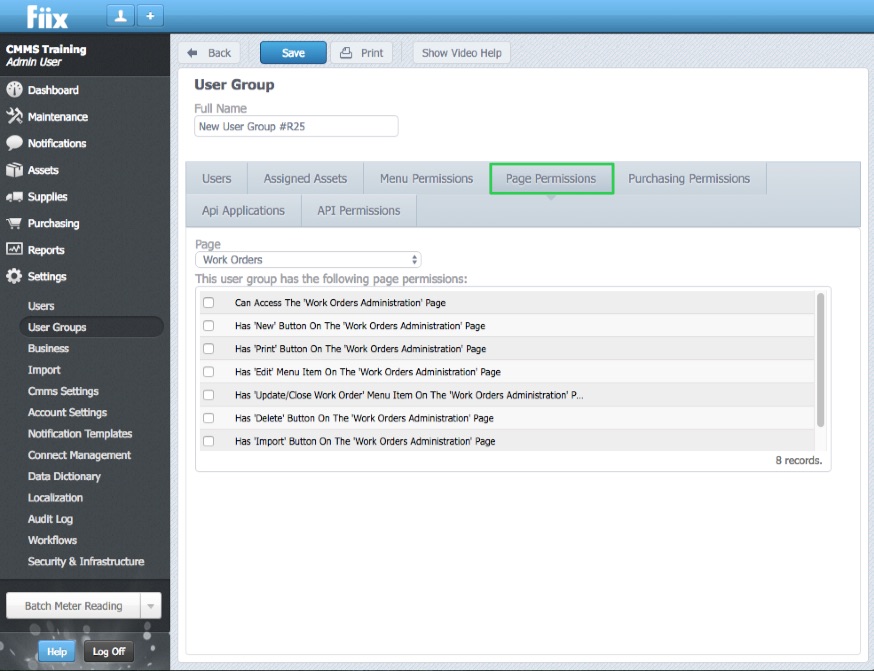
This process will need to be replicated for every page you want to give your team access to. This can be quite time consuming but is a necessary step to ensure your team only have access to the pages you want and can only carry out the actions you have defined.
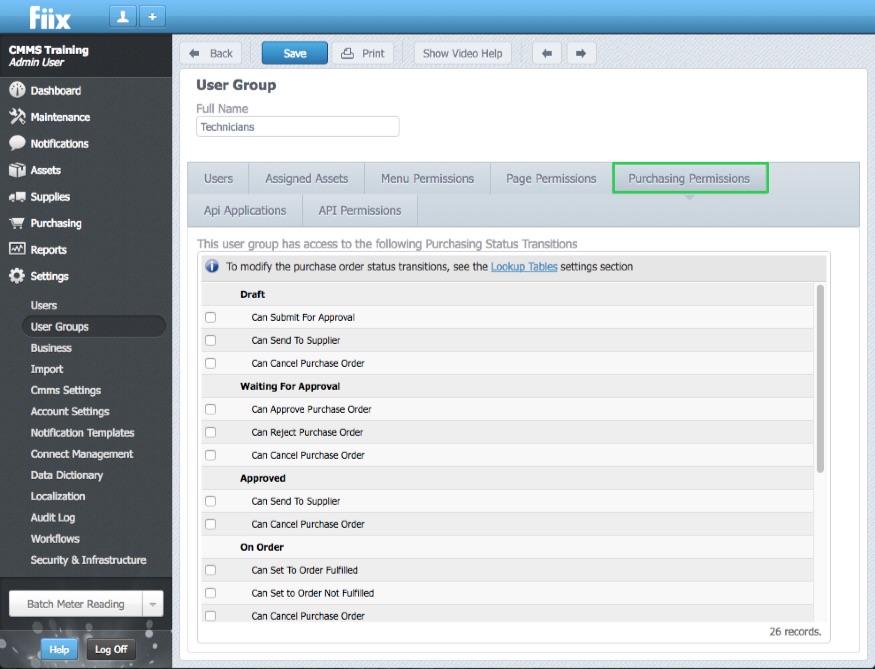
5. Purchasing Permissions
The Purchasing Permissions allow you to define what actions your team can take when it comes to the transition of purchase order status. You will need to set these specific to your needs. If you do not want the group to have any purchasing powers you can simply leave this tab as it is.
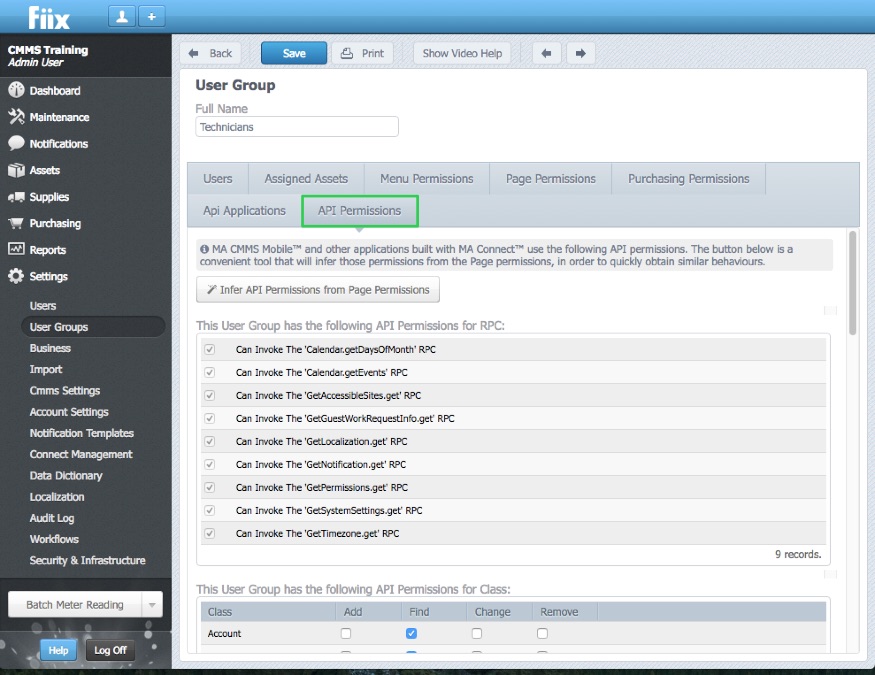
6. Api Permission
The Api Permissions tab defines what permissions users have while using the mobile app. If you want your team to have the same permissions on mobile as they do on the desktop version of the CMMS you can simply click Infer Page Permissions From Page Permissions as highlighted in the attached screenshot. Certain permissions are predefined here and cannot be changed or removed. It is important to remember that not all features & functionality available to you on the desktop are available on mobile.
Important Note: If you have an existing Group set up whose permissions will be similar to that of the new group you want to create you can save time by duplicating the existing group and modifying the permissions.
Related Articles
ZenduMA- Setting up new users on standalone platform
This article explains how to set up new users in ZenduMaintenance: There are two types of users in the CMMS, Active and Inactive users. Active users can login to the CMMS. Inactive Users Cannot login to the CMMS. There is no difference when setting ...ZenduMA - Creating an asset hierarchy manually
This article explains how to create an asset hierarchy manually: Steps: 1. Start by creating the main site location. This is the location where all of the child assets will be located. Select Assets and New 2. Select Locations or Facilities 3. ...ZenduMA - Adding Equipment assets
This article explains how to add equipment assets: Setting up your equipment assets is similar to the Add Locations and Facilities procedure. You can add as many pieces of equipment as you like, and you can also shape your hierarchy, creating ...ZenduMA - Adding parts and labor costs to work orders
This article explains how to add parts and labor to work orders: Labour To track labour costs on a work order, ensure that each used is assigned an hourly rate. 1. To add an hourly rate, select Settings, Users, and select a user 2. Enter a hourly ...ZenduMA - Search a work order
This article explains how to search for a work order on ZenduMA: To help search for vast numbers of work orders, utilize the search bar 1. The search bar can be used to search for information in a majority of the selectable columns, i.e Code, ...