ZenduMA- Setting up new users on standalone platform
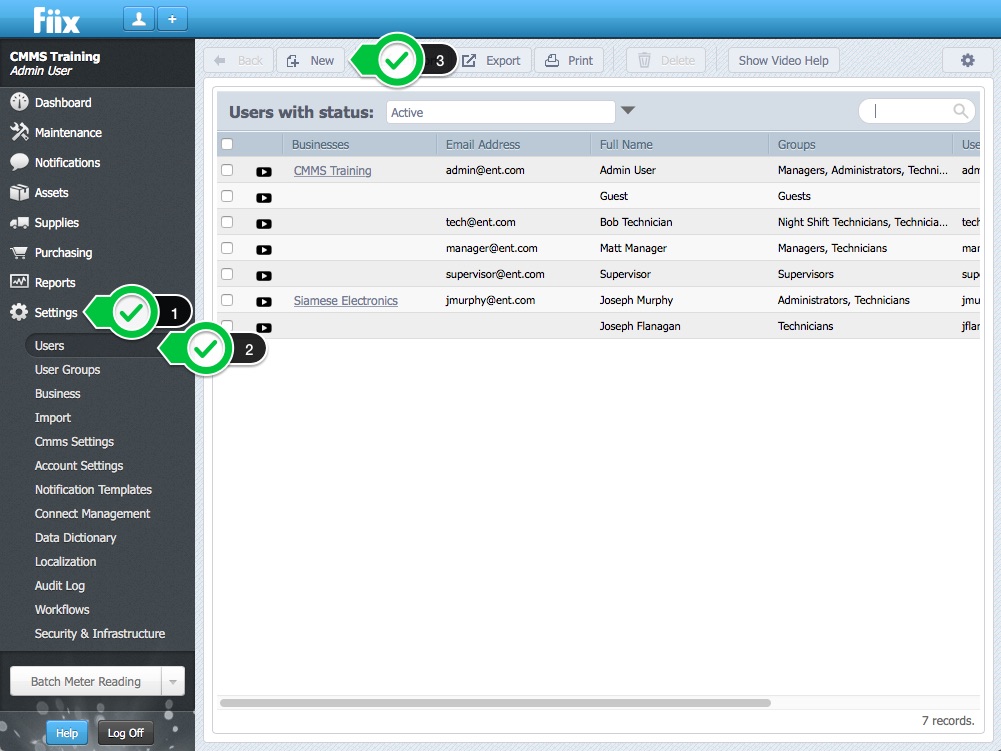
This article explains how to set up new users in ZenduMaintenance:
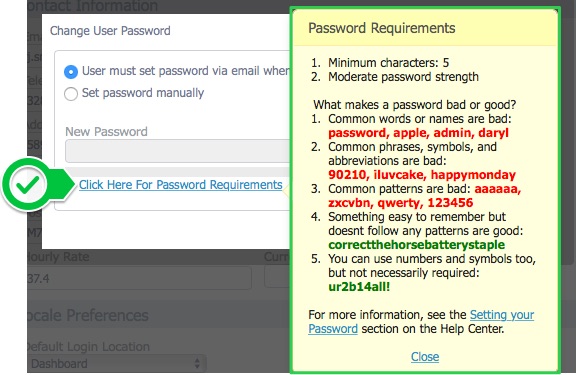
- When choosing the Password, you need to ensure that it meets the required standards. The password strength checker below the password field will show when your password is acceptable.
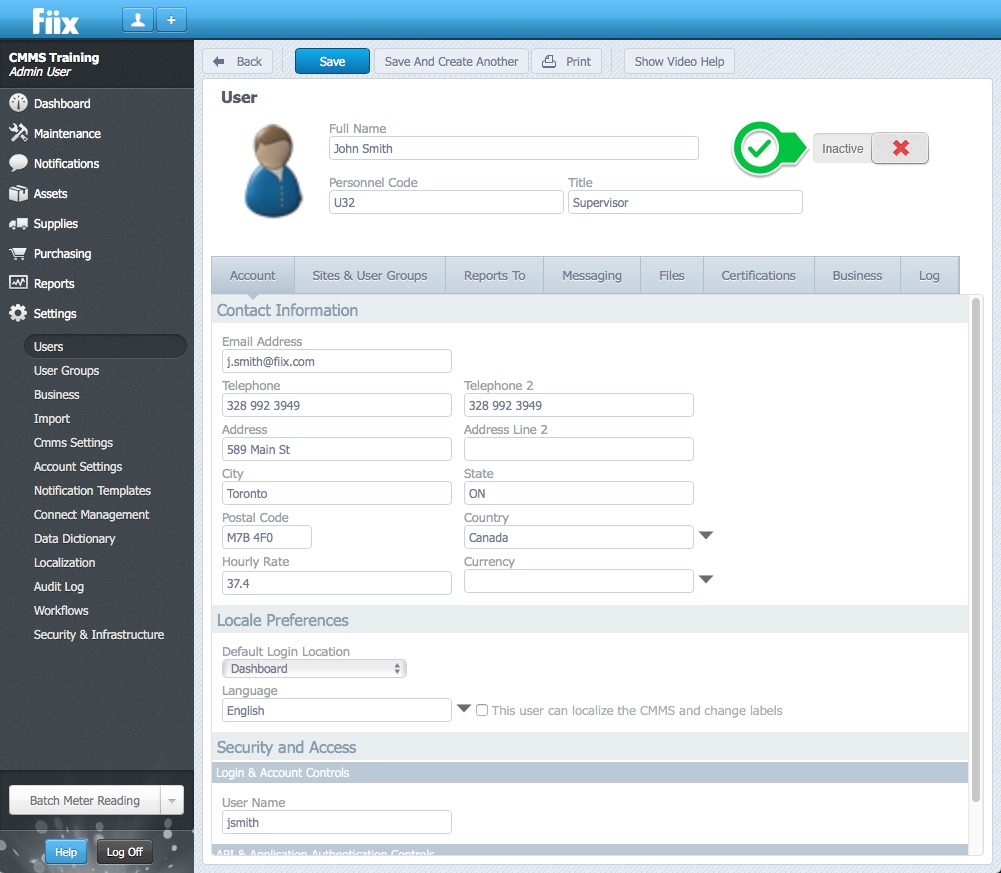
- The Personnel Code is a unique identifier assigned to each User. This is automatically generated for each new User (optional)
- The Title is the Users job title (optional)
- The Hourly Rate is used to calculate labor costs for Work Orders (recommended). The user work order labor hours are multiplied by the hourly rate to determine labor costs.
- The Telephone is the User phone number (optional)
- The Default Login Location defines what page the user will see first when they login. There are 4 options to choose from here.
- Set the Language for the user.
- Insert the Users Name under Login & Account Controls (mandatory)
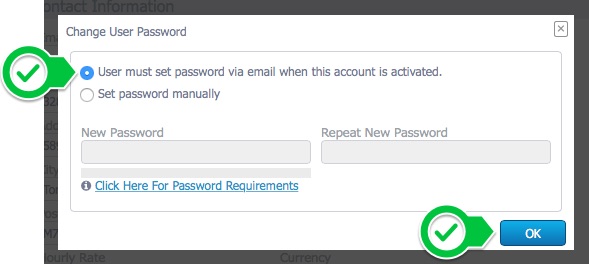
2. Here you can set up the user password manually, or have the user set their password via email when their account is activated.
2a. To set a password manually, enter a New Password, Repeat New Password, and click OK
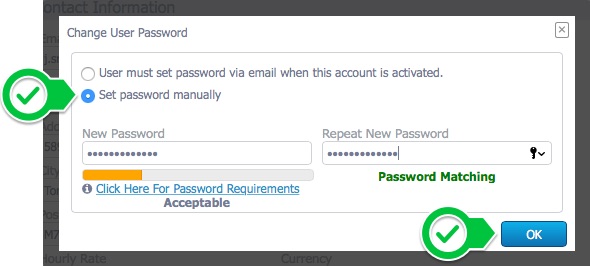
Click Click Here For Password Requirements for details on Password Requirements
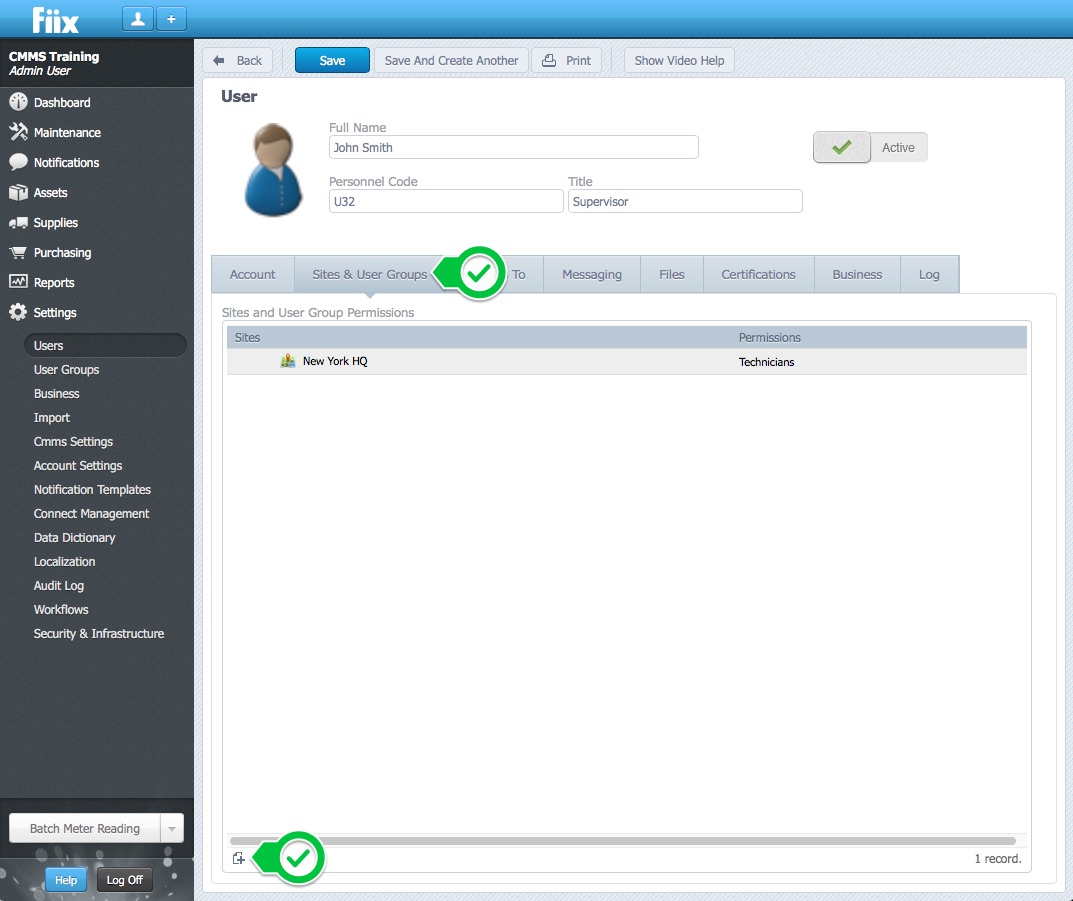
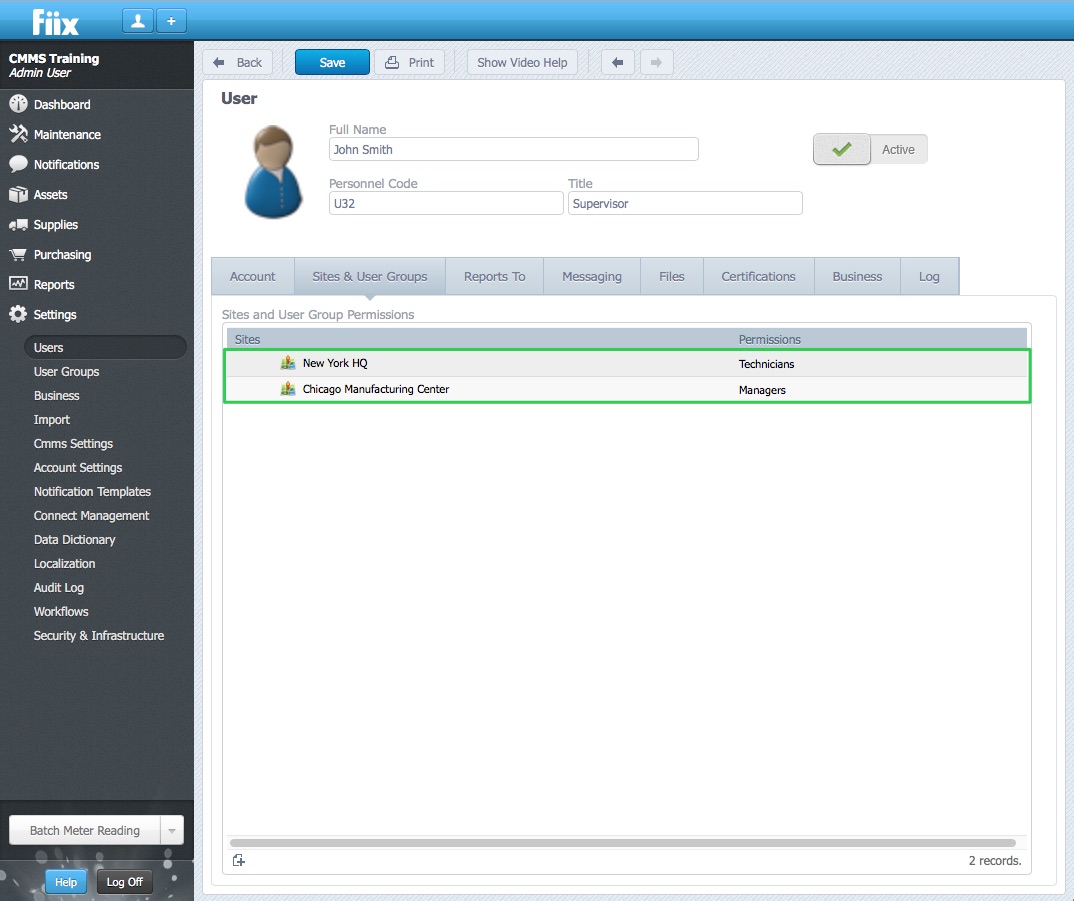
2. User groups / Sites & user groups
1. The User Groups tab allows you to decide which user groups the user is assigned to. User groups also determine the user permissions. For users with the multi-site functionality switched on, this tab it's called Sites & User Groups. To add the user to a new user group, click New.
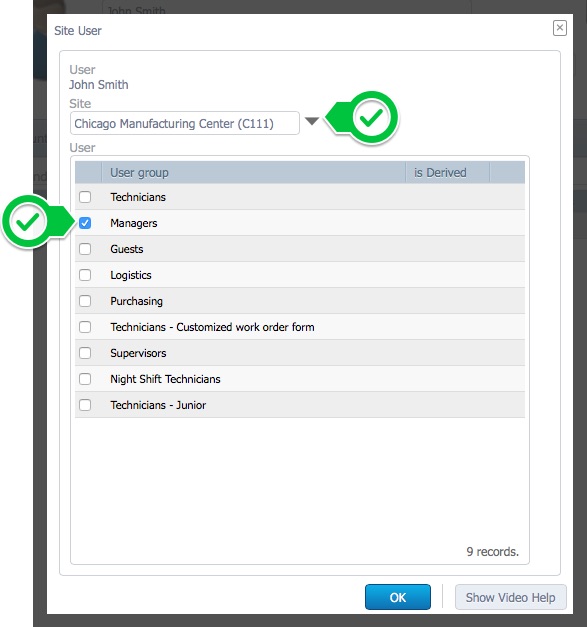
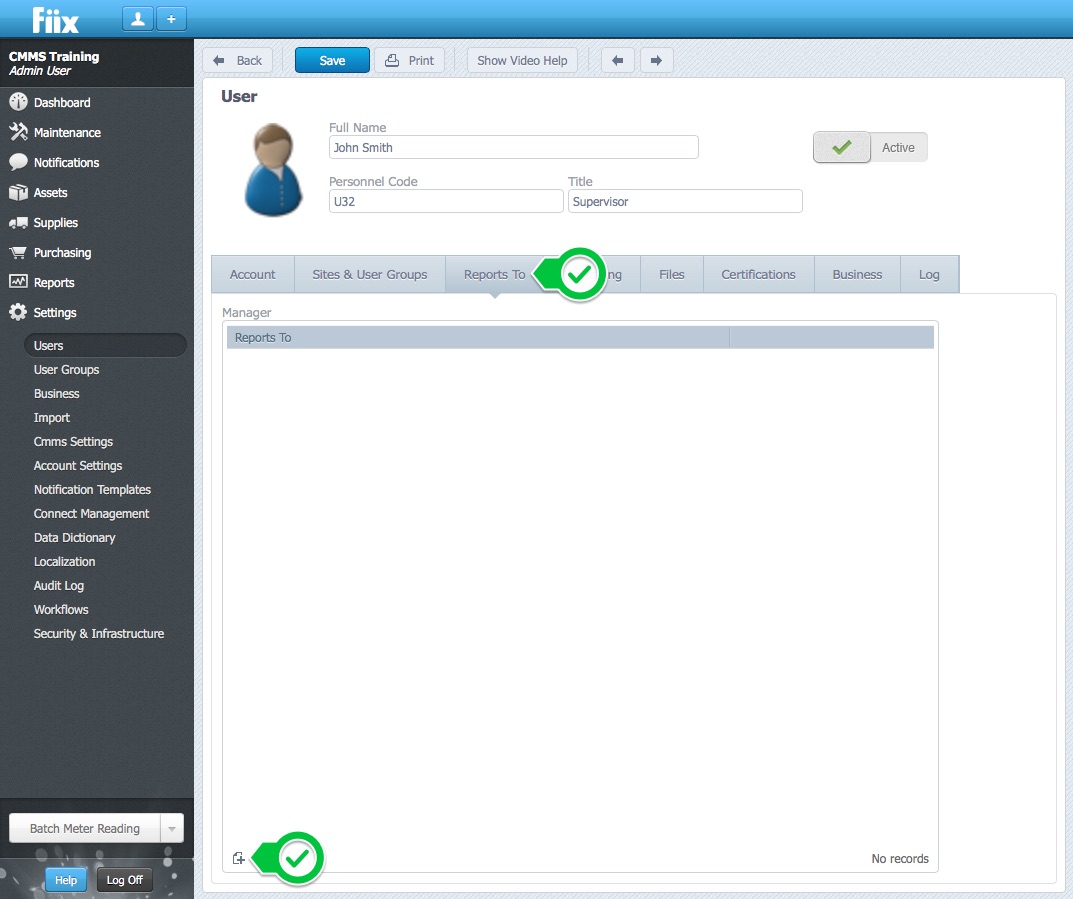
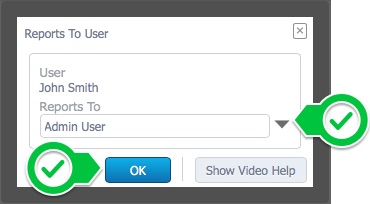
2. Use the dropdown to select who the user reports to, and click OK
3. Once selected, this information will be displayed as below.
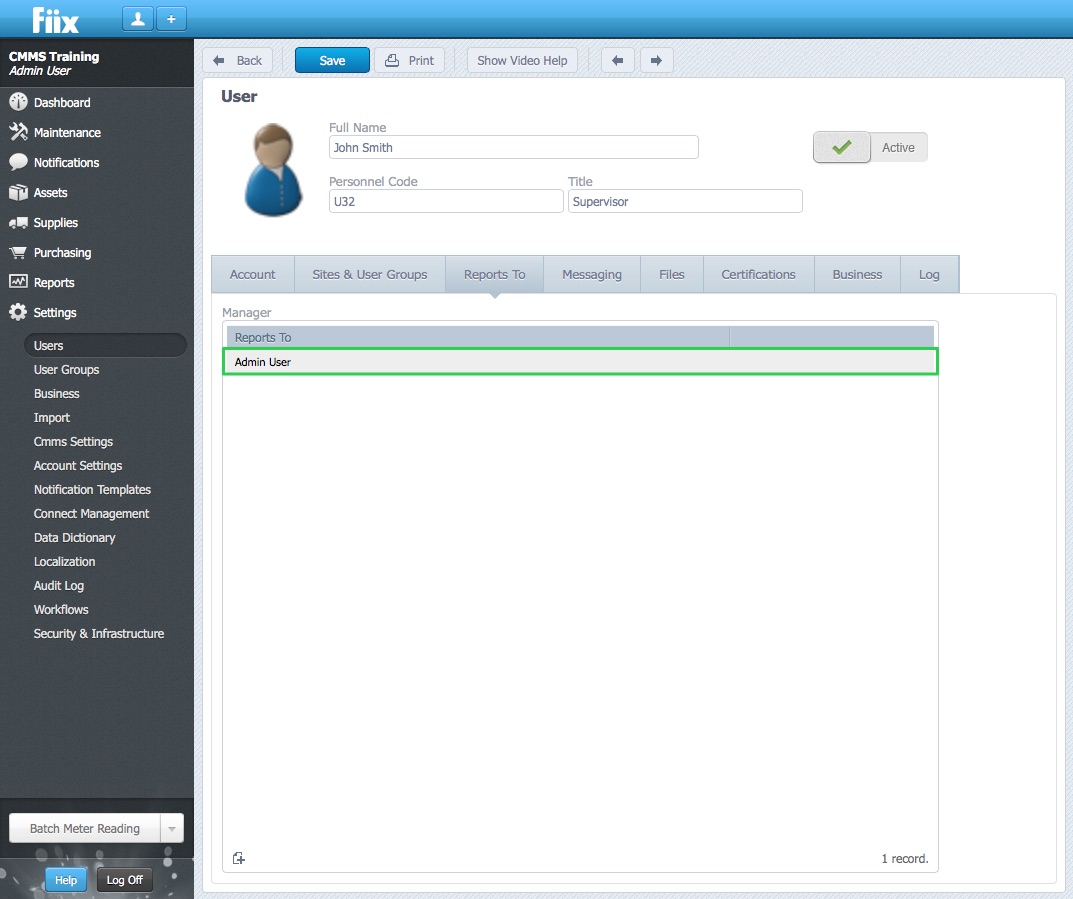
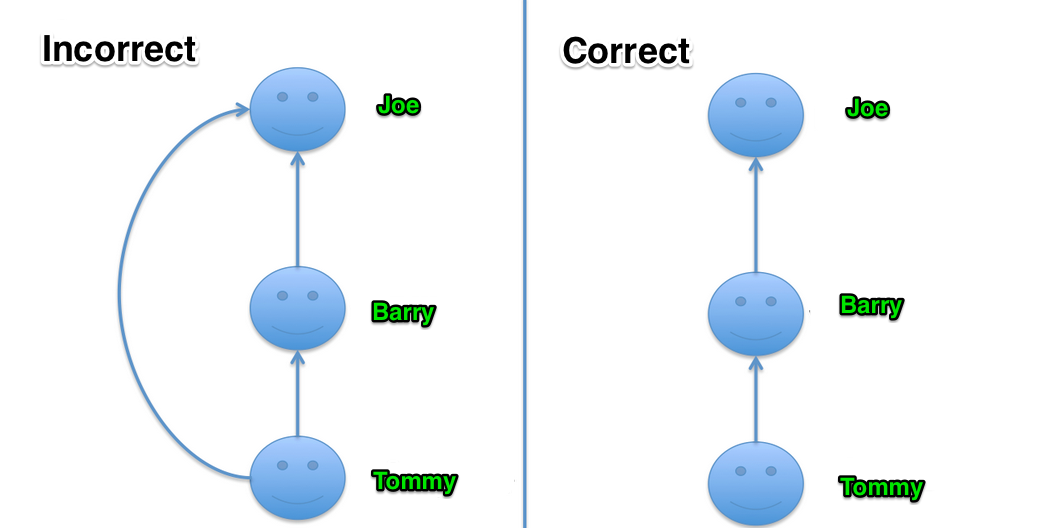
In the example above Barry reports to Joe, while Tommy Reports to Barry. As such, there is no need for the direct link from Tommy to Joe as Tommy reports to Joe through Barry. It is important to respect the hierarchical structure when setting up users on your CMMS, as a failure to do so can lead to issues when viewing Work Orders assigned to 'Me and users reporting to me'.
4. Messaging
When users get assigned to work orders, they will receive the emails as set in the notifications tab of the work order. The Messaging tab on the user record works differently. This determines what work order notifications the user receives based on their asset assignment. For example, a user is not assigned to the work, but receives a notification as they are assigned to the asset in the department that they manage.
1. Select the Messaging tab.
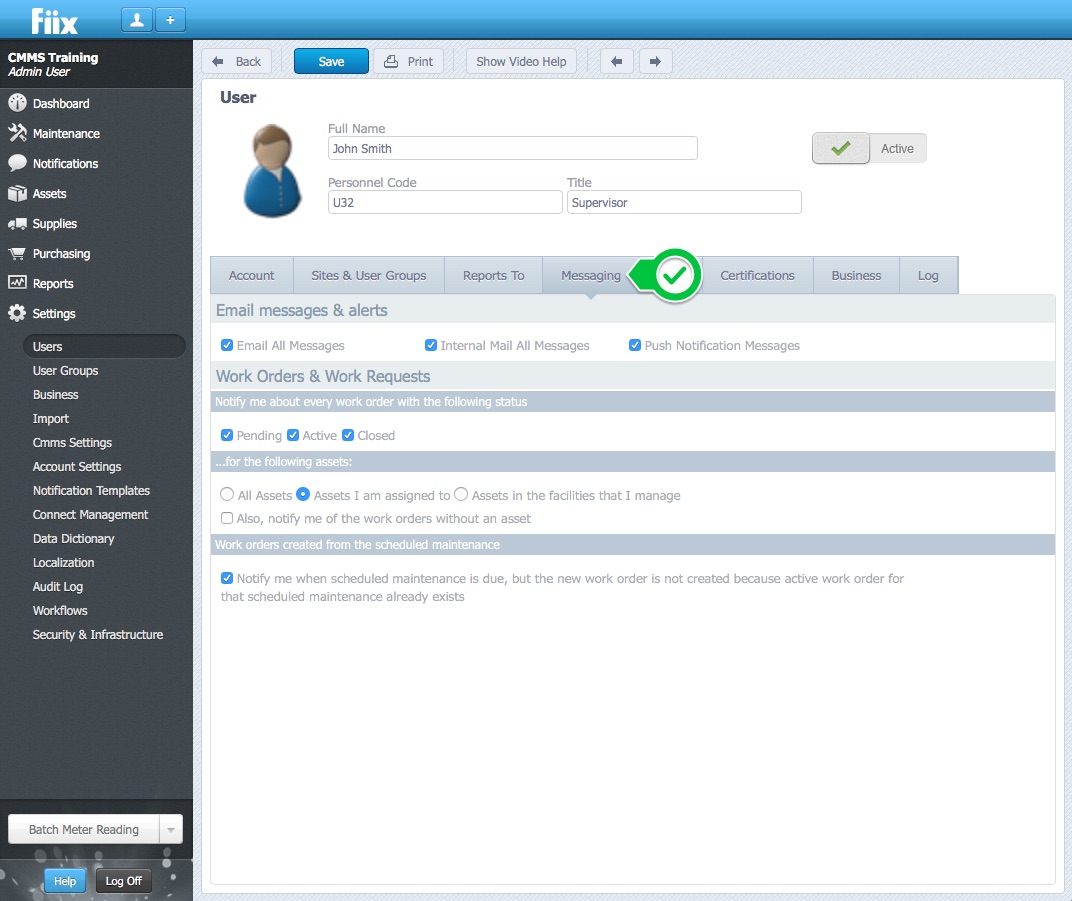
- Email All Messages: An email is sent to the user’s external email account like gmail, outlook, hotmail etc. To stop email notifications being sent to your external account, uncheck the checkbox and select Save from the right hand side of the browser window.
- Internal Email All Messages – An email is sent to the users CMMS account. Internal email messages are viewed by signing in and selecting Notifications
- Push Notification Messages: A notification is sent to the users mobile device, for active work orders, that the user is assigned to. The user must be logged into the mobile application, and be connected to the internet to receive notifications.
- All assets: The user receives notifications for all assets at your site in the CMMS
- Assets that I am Assigned to: The user receives notifications for the assets that they are assigned to. The user must be added to the personnel tab of the asset (ideal for larger companies)
- Assets in the Facilities that I manage: The user receives notifications for their assigned asset, and all assets below it in the asset hierarchy. For example, if the user is assigned to building 1, then the user will get all of the notifications for building 1, and ever sub-asset below it in the hierarchy.
- Also, notify me of the work orders without an asset: The user will receive messages for work orders without an assigned asset.
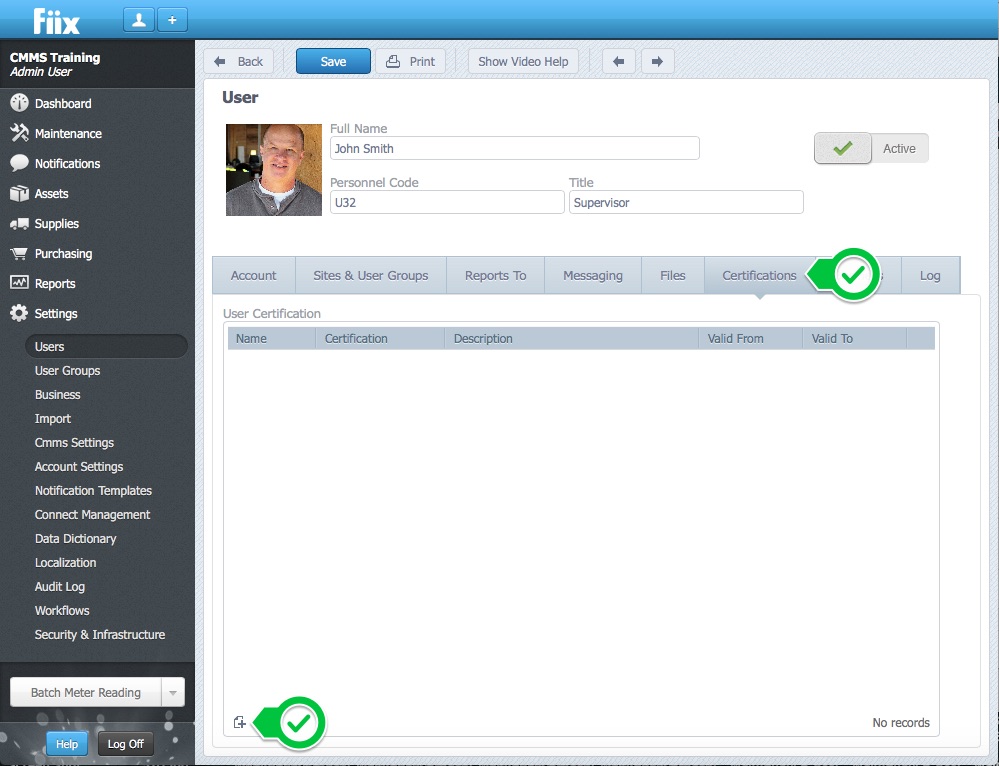
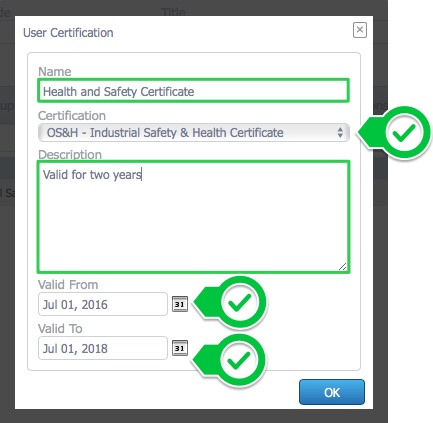
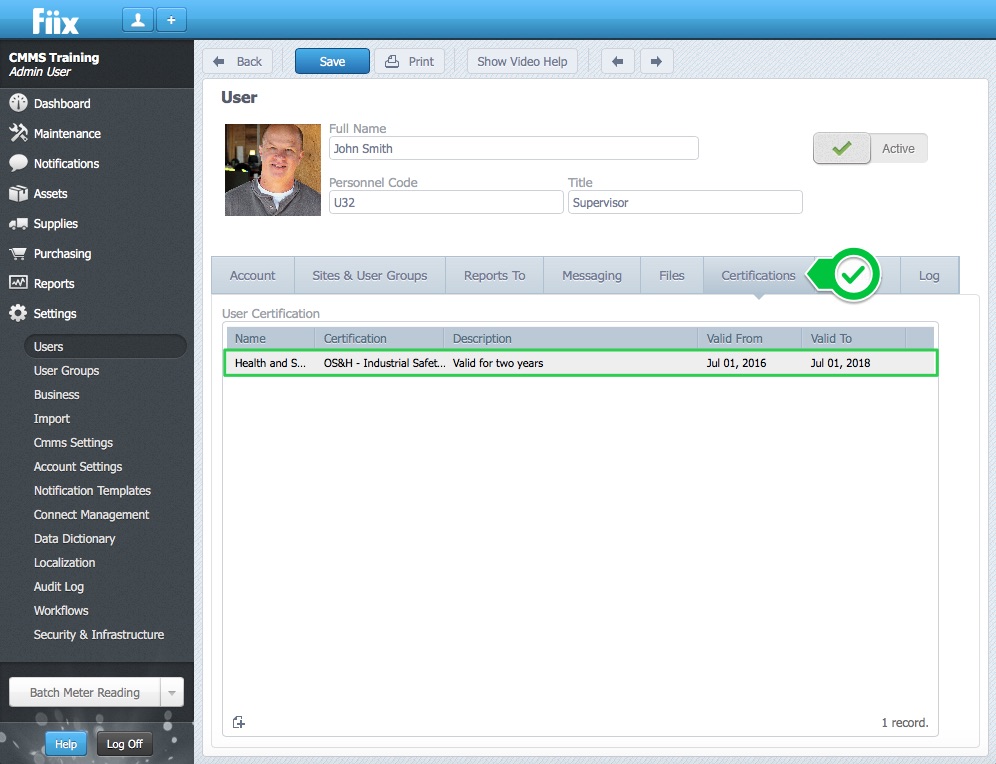
3. The certification will now be displayed.
Related Articles
ZenduMA - Adding Equipment assets
This article explains how to add equipment assets: Setting up your equipment assets is similar to the Add Locations and Facilities procedure. You can add as many pieces of equipment as you like, and you can also shape your hierarchy, creating ...ZenduMA (Fiix) - Admin Guide
Standard Operating Procedures- Admin Guide Table of Contents Background 4 What is a CMMS? 4 What does a CMMS do for an organization? 6 When entering data into the CMMS, it must be: 6 Why a Standard Operating Procedures manual? 7 Basic Account ...ZenduMA User Guide
Standard Operating Procedures- Admin Guide Background What is a CMMS? CMMS stands for “Computerized Maintenance Management System”. Maintenance software is used by maintenance managers to assist them in the management of their maintenance activities. ...Adding Meter Readings on Mobile
Overview This procedure demonstrates how to add a meter reading to an asset. Meter readings can be added to the Locations/Facilities, Equipment, Tools, and Work Order modules. The steps to follow are identical for all four modules. Steps: 1. Open a ...Step 2: Add New Users
Overview T here are two types of users in the CMMS, Active and Inactive users. Active users can login to the CMMS. Inactive Users Cannot login to the CMMS . There is no difference when setting up active and inactive user accounts. When it ...