ZenduMA - Adding Equipment assets
This article explains how to add equipment assets:
Setting up your equipment assets is similar to the Add Locations and Facilities procedure. You can add as many pieces of equipment as you like, and you can also shape your hierarchy, creating equipment as both parent assets, and child assets.
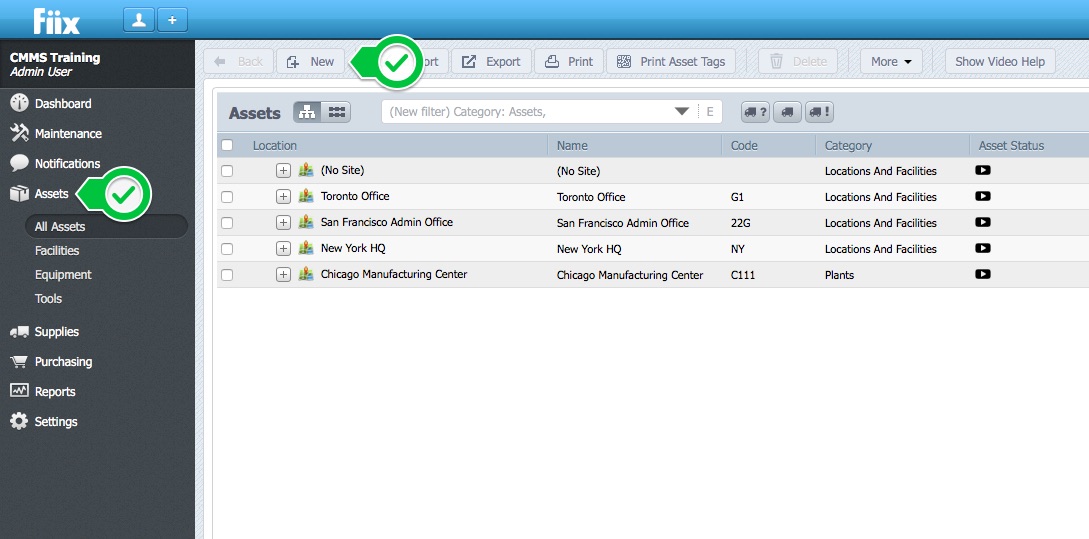
1. To begin, click Assets, and New.
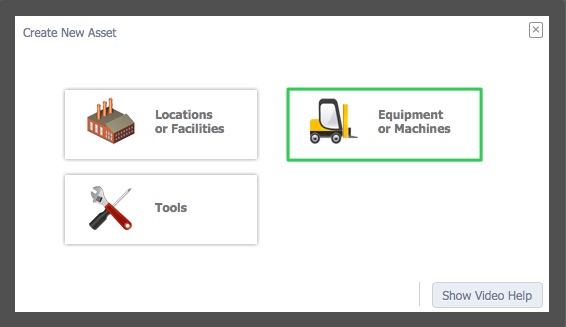
2. Next, click Equipment or Machines.
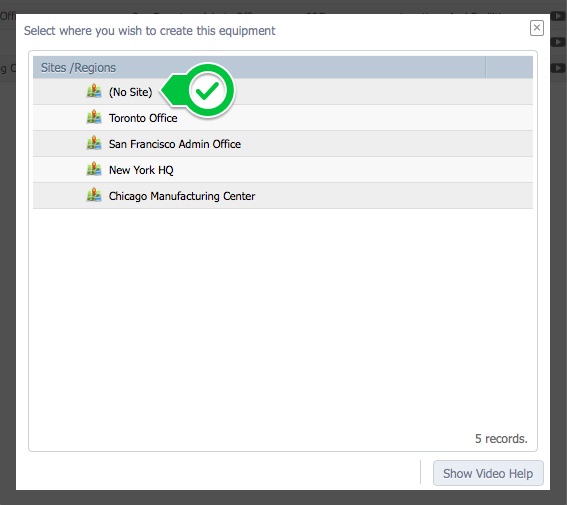
3. Select the site where the asset is located. In this case, the asset location is (No-Site).
General Tab
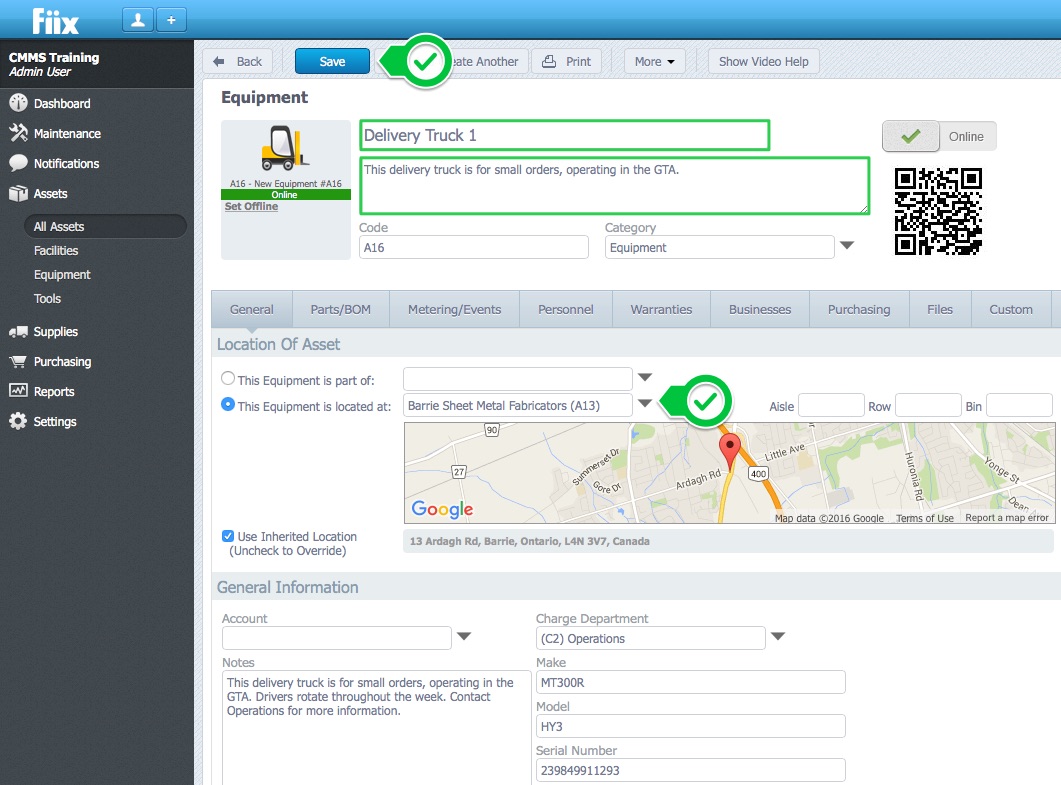
4. The General tab is the same as when you are setting up facilities. This is where you add the asset name, description, code, location etc. In this example we want the delivery truck to be located at a facility. To choose where the equipment is located, select This Equipment is located at, and pick the desired location.
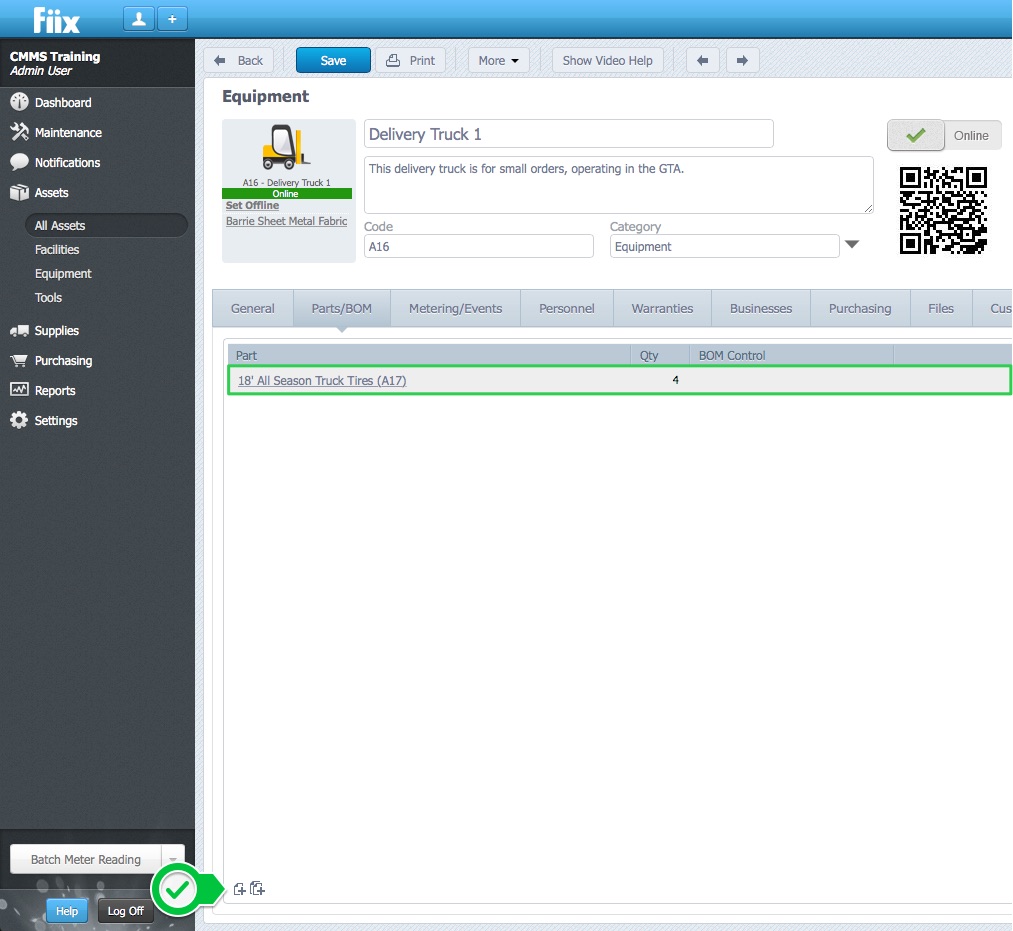
Parts/BOM Tab
5. Parts associated with, or make up the piece of equipment can be added under the Parts/BOM tab. To add parts select the small New button, select the part, and enter the quantity.
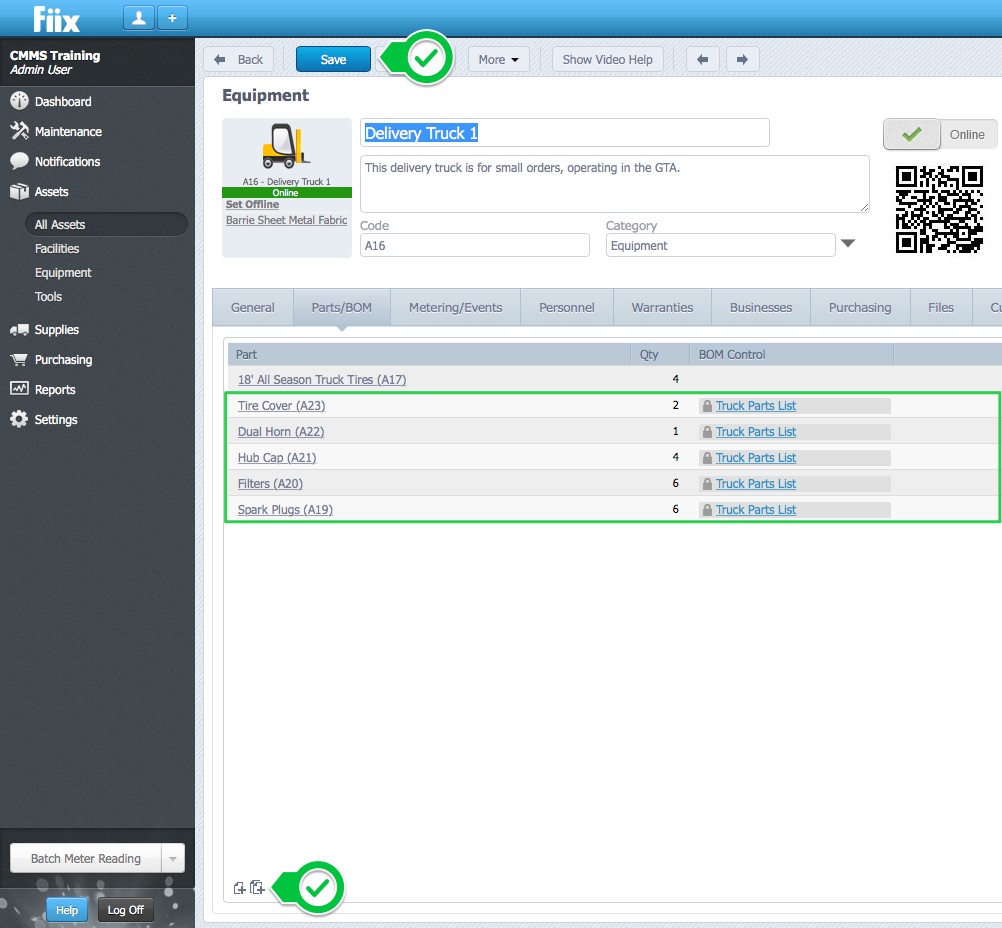
6. To add a Bill of Materials list (BOM), select the large New button, select the BOM group, and click Save.
Metering/Events
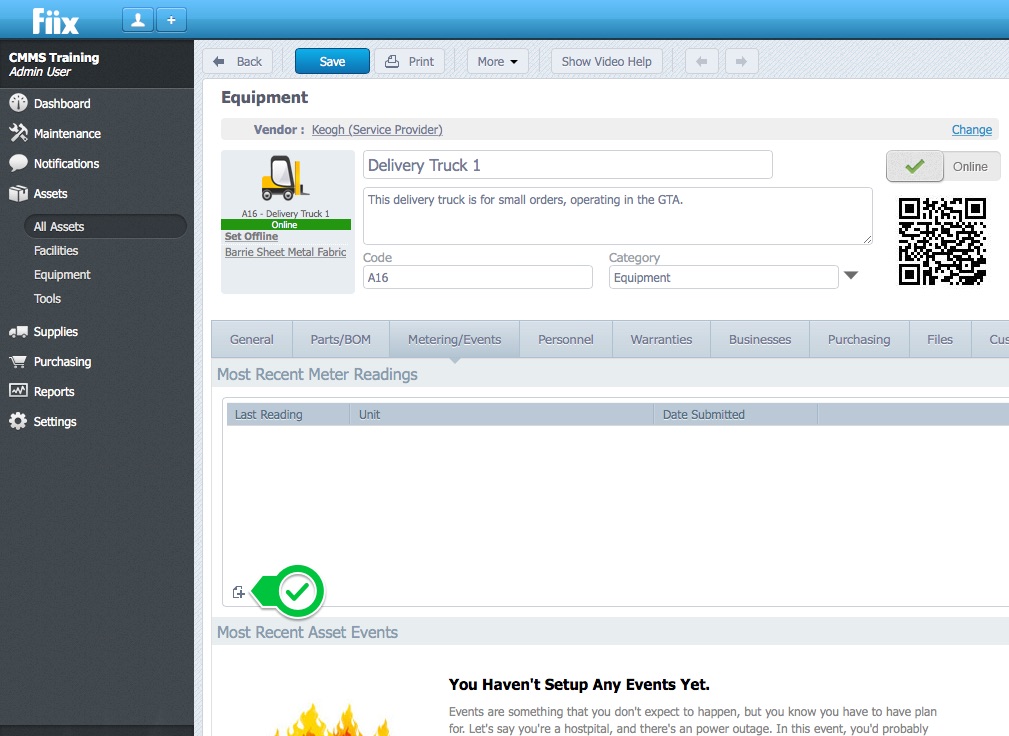
7. To log meter readings against the asset, click the new button.
8. Enter the meter reading, select the meter reading unit, and click OK.
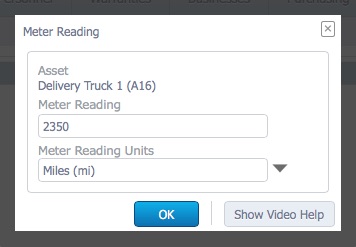
Note:- Scheduled maintenance can be triggered by a meter reading, so make sure that the meter reading you are entering is correct for that asset. Any meter reading that triggers a Scheduled Maintenance cannot be deleted.
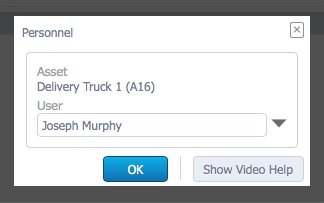
Personnel Tab
Users can be assigned to the asset under the Personnel tab. Users listed here, receive any relevant notifications associated with the asset.
9. To assign a user, click New.

10. Select the user from the dropdown menu, and click OK.
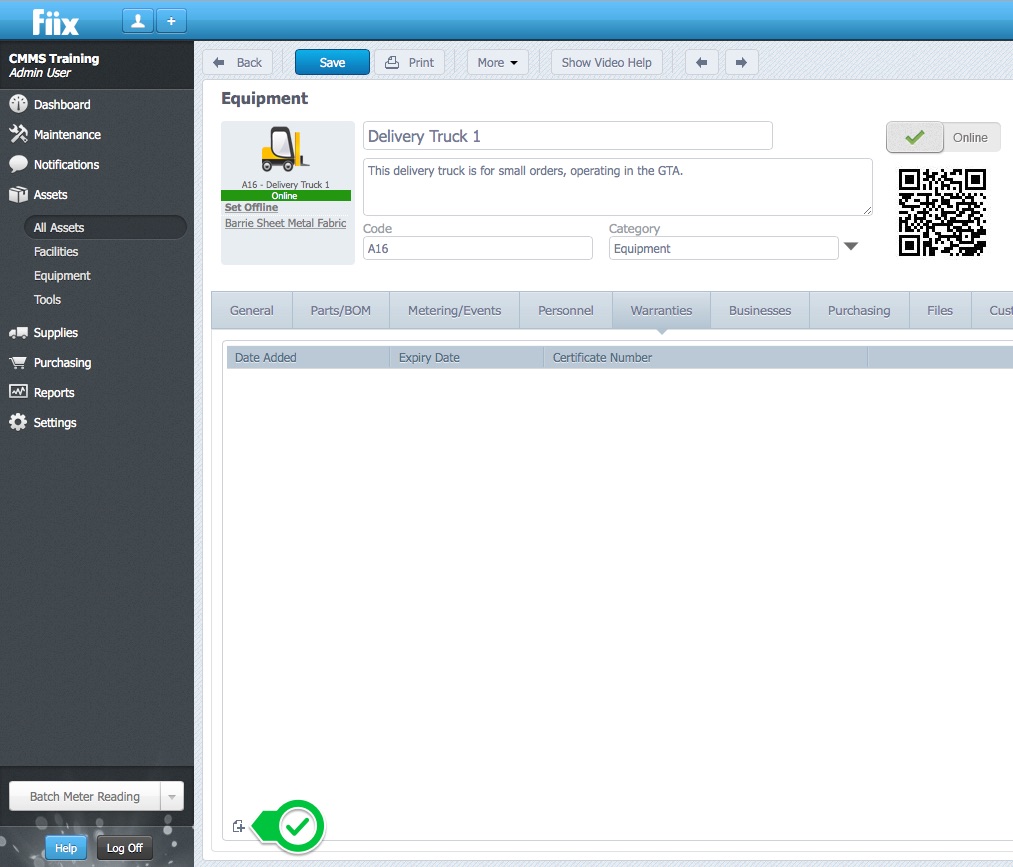
Warranties Tab
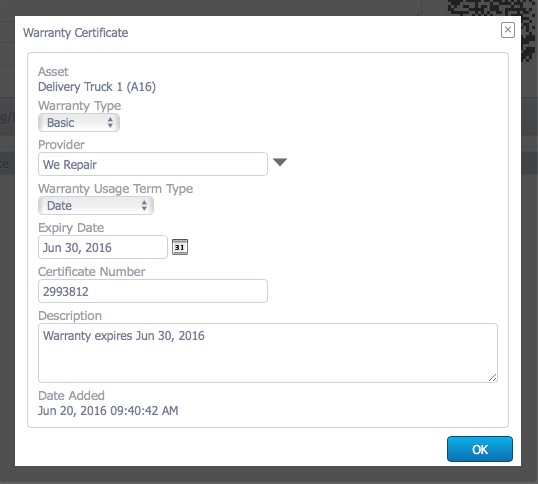
11. Warranties can be added under the Warranties tab. To add a warranty, click New.
12. From here you will be met with the following pop up box where you fill in the relevant warranty information.
Businesses Tab
Vendors and Customers can be associated with the asset under the Businesses tab.
13. Navigate to the Businesses tab, and click New.

14. Fill in the relevant information for the associated business, and click OK.

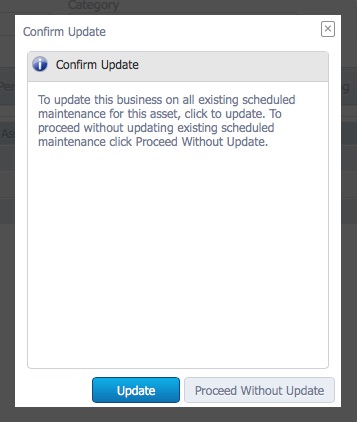
15. Choose an option to confirm the update.
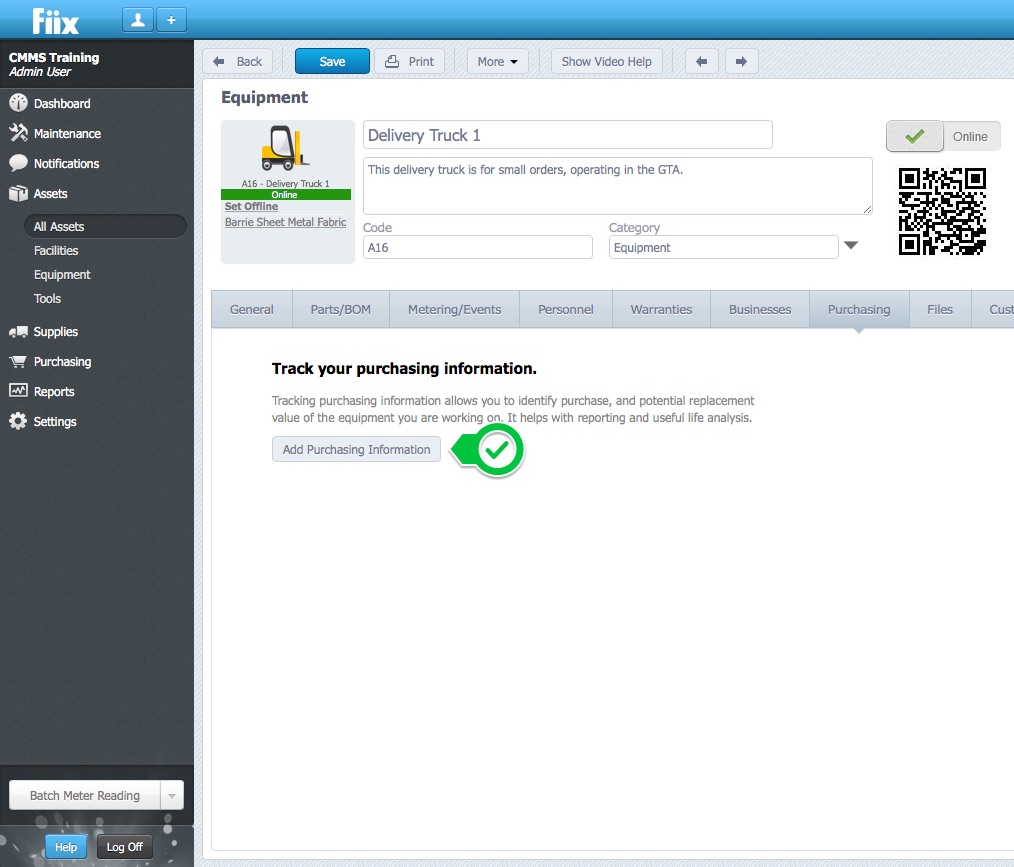
Purchasing Tab
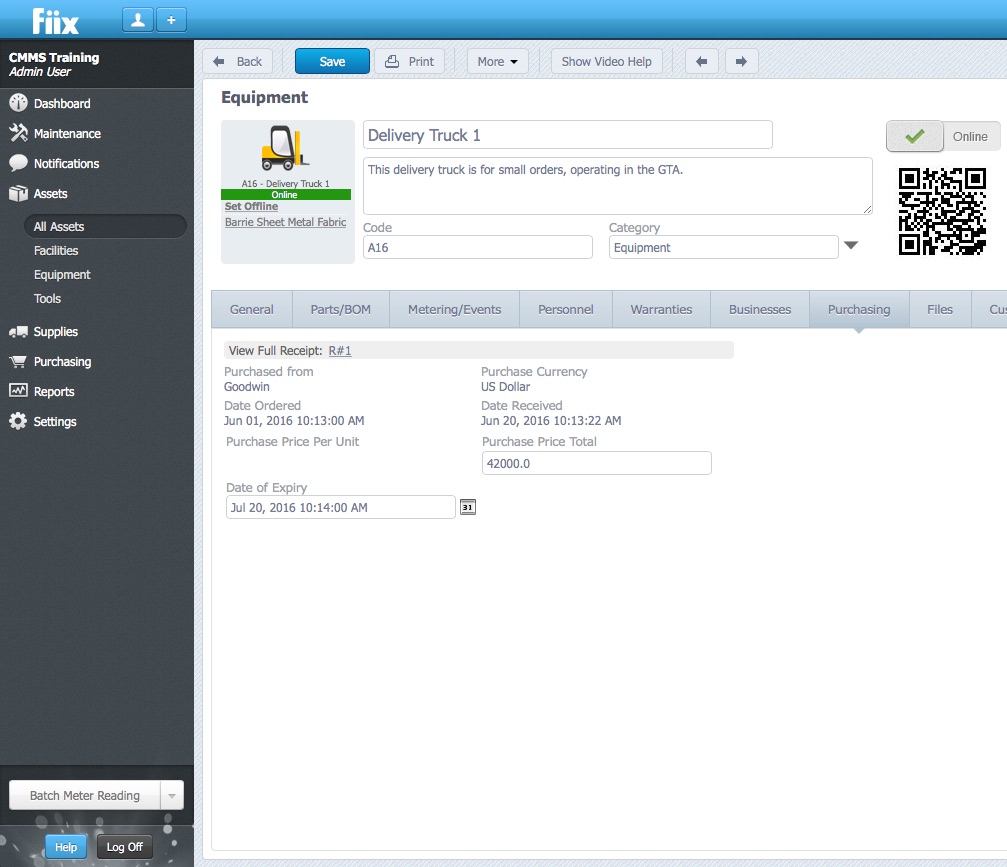
16. The receipt for the asset can be added under the Purchasing tab. To add the receipt, click 'Add Purchasing Information', and fill in the relevant information.
17. When complete, the receipt will be shown under the Purchasing tab as follows:
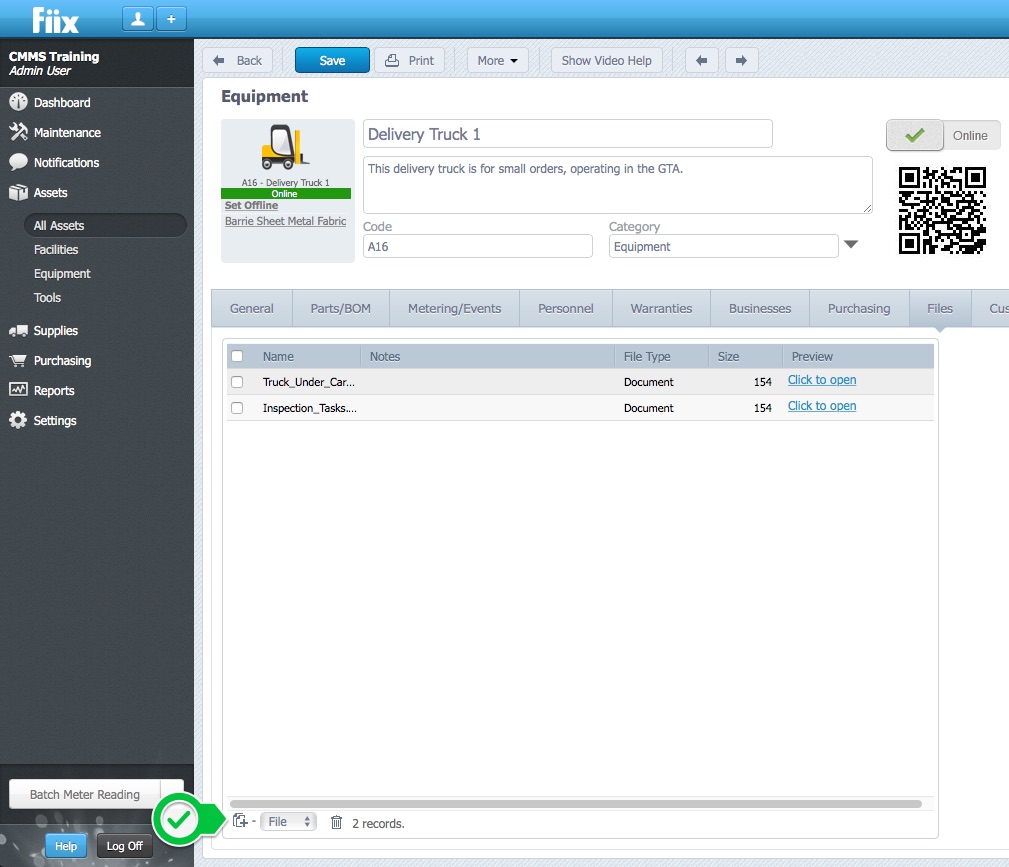
Files Tab
18. Files can be added by dragging-and-dropping the file into the window, or manually by clicking New.
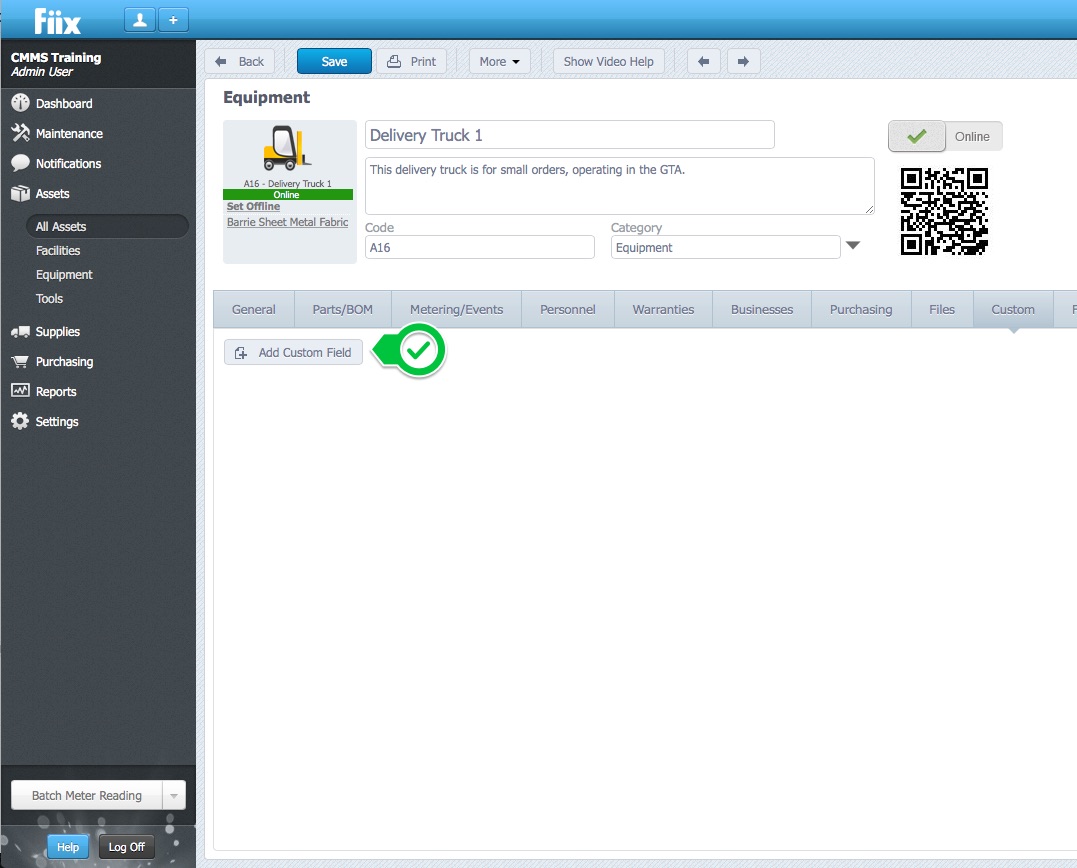
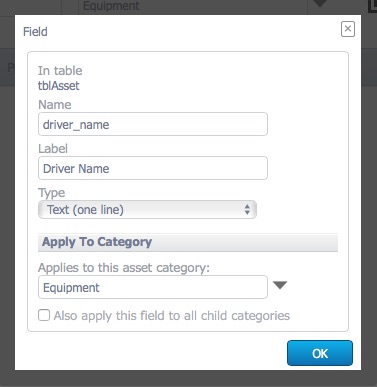
Custom Tab
19. Custom fields can be added under the Custom tab. To add a custom field, click Add Custom Field.
20. Enter the relevant information, and click OK.
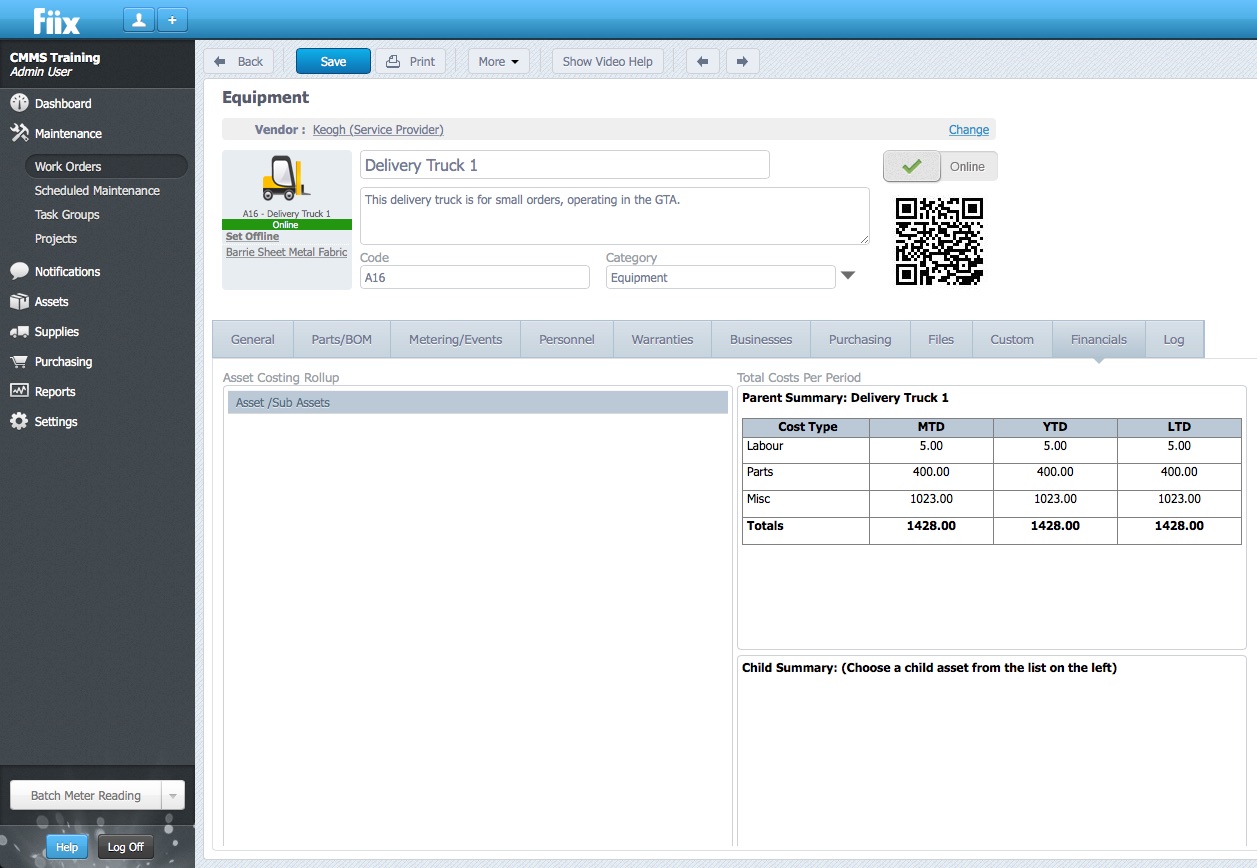
Financials Tab
21. The Financials tab is used to view all costs associated to work orders including a top level facility or piece of equipment, and any lower level child assets. This module will populate once costs have been made against the asset, or its child assets.
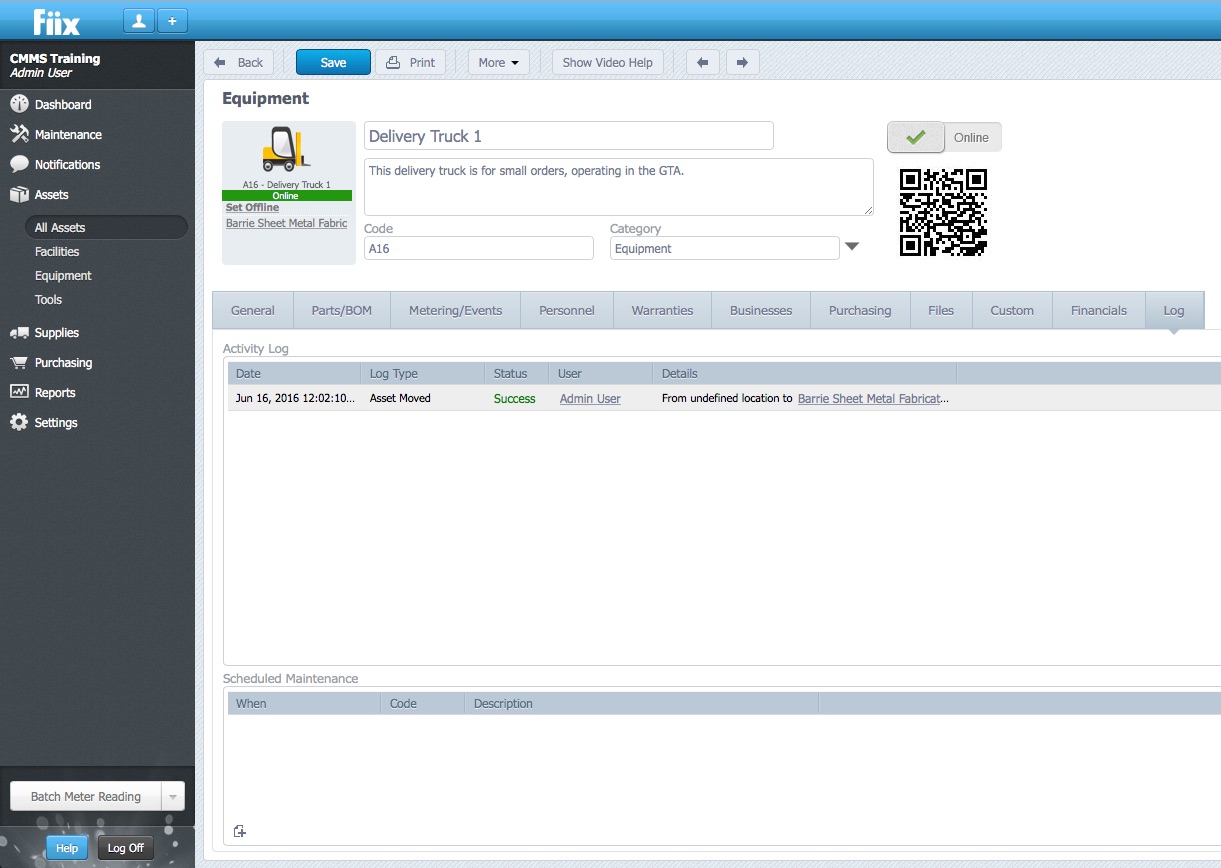
Log Tab
22. The Log tab contains any information relating to the asset. It contains the move history, Scheduled Maintenance, Open Work Orders, Work Order History, Parts Supplies Consumed, Work Order Log, and the Offline/Online history of the asset.
Related Articles
ZenduMA (Fiix) - Admin Guide
Standard Operating Procedures- Admin Guide Table of Contents Background 4 What is a CMMS? 4 What does a CMMS do for an organization? 6 When entering data into the CMMS, it must be: 6 Why a Standard Operating Procedures manual? 7 Basic Account ...ZenduMA User Guide
Standard Operating Procedures- Admin Guide Background What is a CMMS? CMMS stands for “Computerized Maintenance Management System”. Maintenance software is used by maintenance managers to assist them in the management of their maintenance activities. ...ZenduMA- Setting up new users on standalone platform
This article explains how to set up new users in ZenduMaintenance: There are two types of users in the CMMS, Active and Inactive users. Active users can login to the CMMS. Inactive Users Cannot login to the CMMS. There is no difference when setting ...Mobile CMMS - Deleting Assets, Work Orders, and Businesses
Overview The Fiix mobile app allows users to manage files associated with assets and work orders. When the file deletion feature is enabled, users can delete files directly from their mobile devices, enhancing workflow efficiency and maintaining ...Adding Notes on Mobile
Overview This procedure demonstrates how to add notes. Notes can be added to the Work Order, Locations/Facilities, Equipment, and Tools modules. The steps to follow are identical for all four modules. Steps: 1. Open a Work Order, ...