ZenduONE Indoor - Setup MokoSmart Gateways & Beacons in Office
Locate the MK100 Gateways and MS M2 Beacons Provided
All Readers/Gateways and Beacons are labeled in accordance with the following Google Sheet .
Access Trax Backend
Proceed to this link .
If the link had expired : Proceed to ZenduONE Admin→ Users → Database → ‘BLE Testing’.
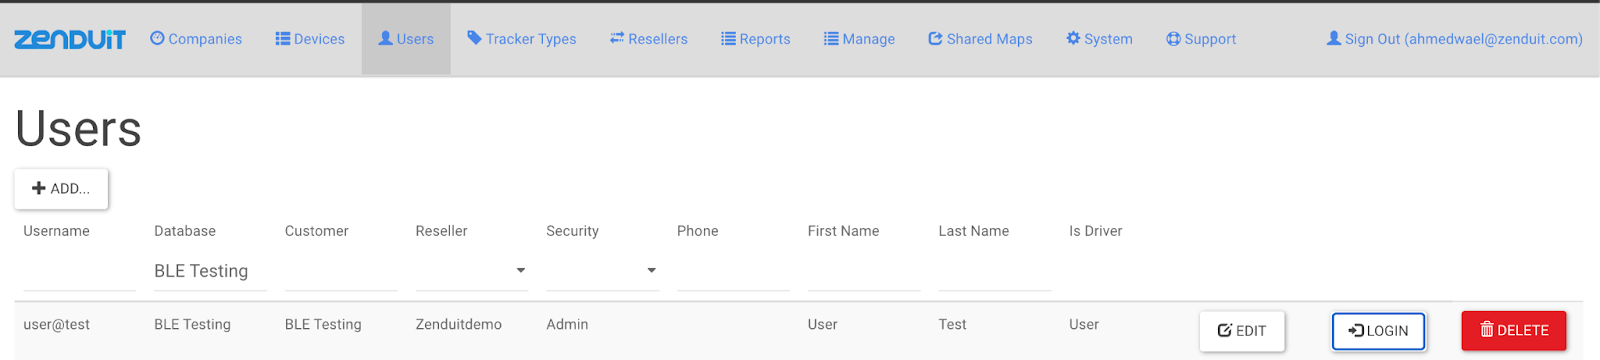
Login.
Once you login, the following window is displayed.

Connecting the Readers/Gateways
View proposed gateway positioning maps , and locate plugs/outlets for each gateway.
Plug in a gateway and follow the instructions to set it up. (start with R1 and move along all the way to R11).
Very important that you take note where you placed which Reader/Gateway at what proposed location (as we will need that information in the following step)
Update Custom Maps
From the homepage (of that database) proceed to Admin → Custom Maps → Zenduit Floor 4 - Taj Test
You will be presented with the following page:

At this stage, click on ‘ Place Readers ’.

Move and Place the Readers/Gateways in accordance with the real physical location and placements of the Readers/Gateways.
Once the Readers/Gateways are active, they will appear as blue on the main map. If they appear as gray, they might not have been set up correctly. Unplug and Plug back in the Reader/Gateway. If that doesn't work, return to step 3 b. and repeat the steps, formatting and reinitializing the gateway.
Turn on Beacons
Flip the Beacons
Unscrew the back cover
Remove the back cover
Locate small black button
Hold small black button till red light flashes rapidly (you will see the red light flashing on the front of the beacon)
Once you have seen the red flashing light, it means the beacon is on. Put the back cover on and seal the Beacon.


The beacons have already been installed onto trax, therefore after turning it on, give it a few minutes and it will automatically turn from gray to blue on the map.
Demo Product
Return to the homepage.
Click on the Building Icon on the map.
Click on the floor ‘Zenduit Floor 4 - Taj Testing’.
Ensure that all the gateways and beacons are appearing as blue on the map and not gray. (You might have to give it some time as all the information properly loads correctly)
Demo the product by moving the beacons and watching their locations update on Trax. (Each update will roughly take 60 seconds to complete as shown in prior testing)
Related Articles
ZenduONE Indoor Site Setup Form
To get started with the ZenduONE Indoor solution, please click here to load the form below and fill out the required information for the team to review the requirement.ZenduONE Indoor - Reader Configuration
How to set up a new reader to use with ZenduONE Indoor. To configure a new reader: Take a new Bluetooth Gateway Plug Mini reader out of the box and record the MAC ID, located above the QR code on the side of the reader. Plug the reader into a wall ...Adding Gateways to Indoor Layout Instructions
From the homepage (of that database) proceed to Admin → Custom Maps → database_name You will be presented with the following page: At this stage, click on ‘Place Readers’. Move and Place the Readers/Gateways in accordance with the real physical ...How do drivers complete a Job in ZenduONE ?
Introduction: This article will guide you through with a step-by-step procedure to complete the Jobs in ZenduONE. Overview The application where the drivers can access the jobs is called “ZenduONE”. It is available on both the iOS and Android app ...How to access a Job in the ZenduONE applcation ?
This article explains how to access a Job in the ZenduONE applcation. Access a Job Note: The application where drivers can access jobs is called “ZenduONE”. The application is available on both the iOS and android app stores. Please ask your drivers ...