Managed Service in ZenduCAM
This article will cover how to set up your rules for managed service (independent reviewers).
Step 1:
Log into ZenduCAM and head over to your rules, selecting the rule you wish to set up.
Step 2:
Under the Actions tab, select "Send Managed Service for Review". then select the users you wish to be notified by when a escalation comes in. 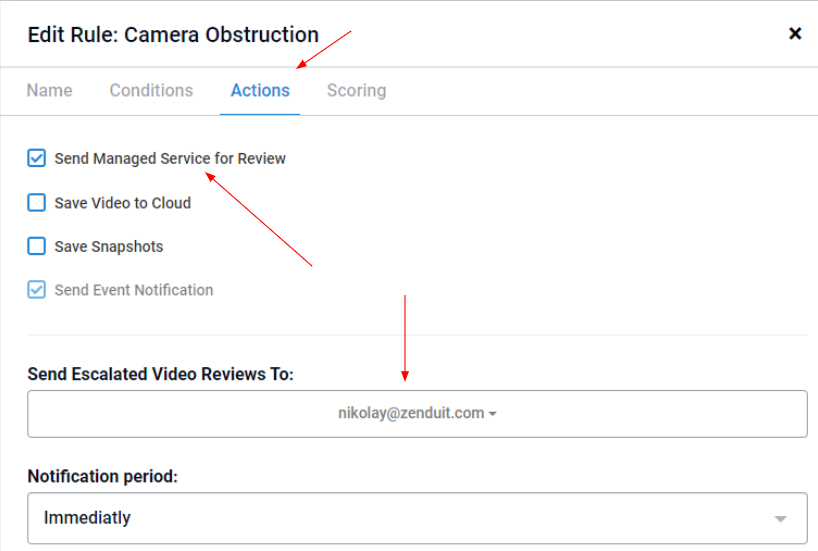
This will send an email to the selected address'.
Here is an example of what you will receive
You can view the video recorded, as well as view the exception on ZenduCAM by clicking the Exception Link
Related Articles
How to add Geofences to the ZenduCam portal ?
This article explains how to add Geofences to the ZenduCam portal. Add Geofences Navigate to the “Admin” tab from the top navigation bar. Select “Geofences” from the side navigation bar. Click “Create Zone”. Provide relevant information for the ...How to view a Job in the ZenduCam portal?
This article explains how to view a Job in the ZenduCam portal. Note: You can view jobs, their status, and other relevant details from the job board. Navigate to the job board by clicking on the “Jobs” tab in the header. You can find specific jobs ...How to access reports in the ZenduCam portal ?
This article explains how to access reports in the ZenduCam portal. Jobs Trips Report Navigate to the “Insights” tab from the top navigation bar. Select “Jobs Trips” from the side navigation bar. Filter the report by either vehicles or jobs. (“Jobs” ...How to create a job in the ZenduCam portal ?
This article explains how to create a job in the ZenduCam portal. Job Details Click the “Add Job” button in the top right corner of the “Jobs” home screen. Enter the name of the job in the mandatory “Job Name” field. Enter the internal reference ...ZenduCAM- Add/Delete groups
This article will explain how to add, edit and delete groups in ZenduCAM. Steps Adding a Group: 1. Login to the ZenduCAM portal 2. Go to the 'Admin' tab 3. Click on the 'Create Group' button 4. Enter the group name in 'Input ...