ZenduCAM ADPlus 1.0 Installation Guide
Step 1 – Specify the position to install the camera
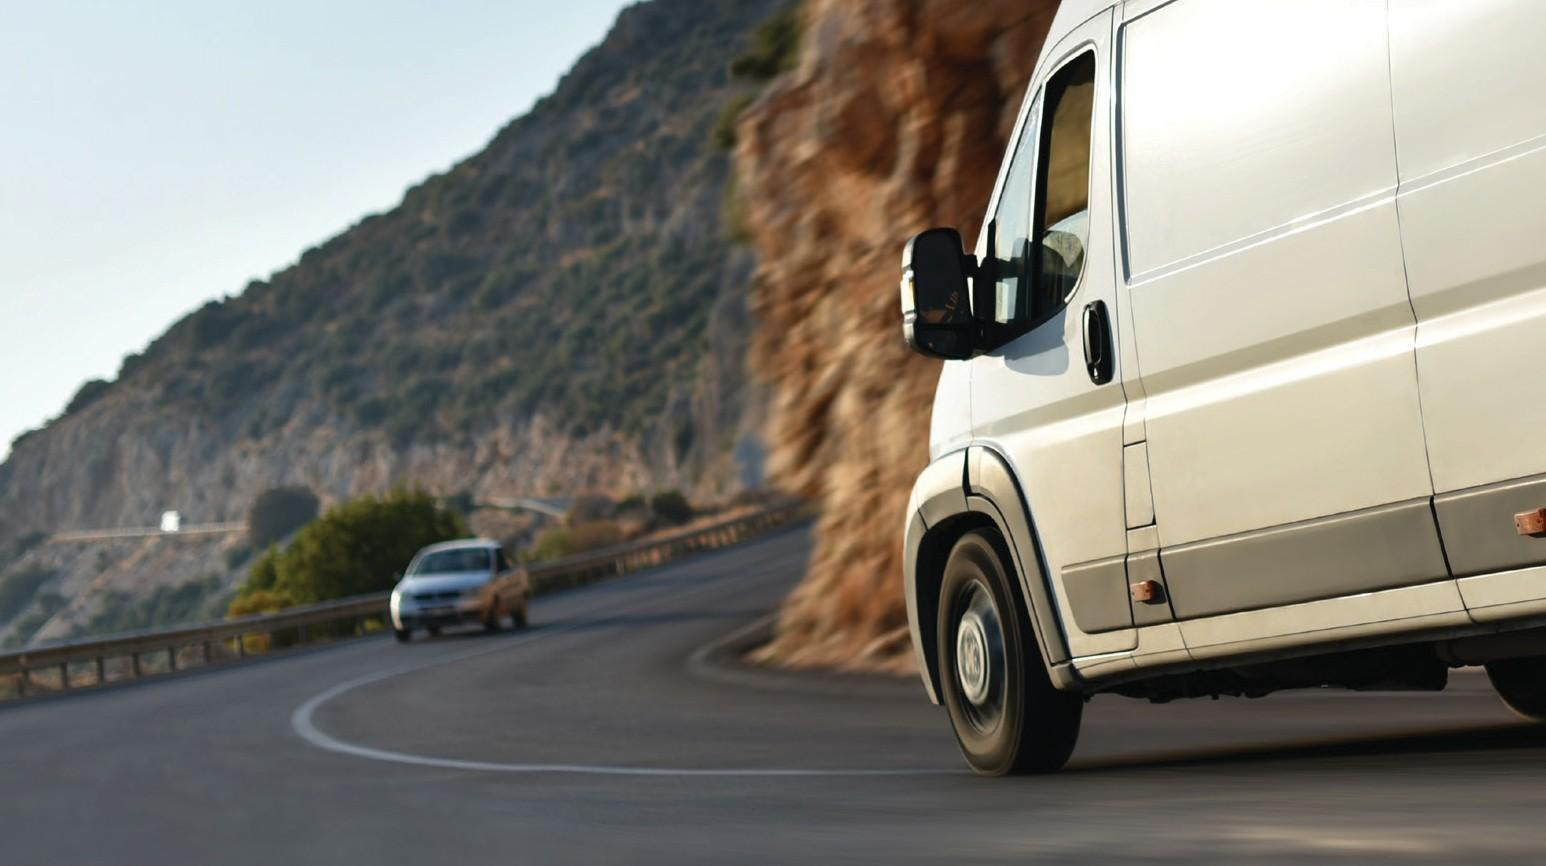
1) The camera must be installed in the middle of the front windshield, generally in the rearview mirror area above the centerline of the front windshield. For optimal accuracy of the forward-facing camera placement must be within 5cm of the center line.
2) The external camera lens must be located within the working range of the left or right windshield wipers.
3) The optimum vertical height of the external camera lens to the ground is between 130 cm-240 cm. Be sure that the camera placement does not interfere with the driver’s view from the rearview mirror.
The ideal installation area is shown in the figure below:
Step 2 – Install the camera bracket
1) Clean the interior and exterior of the glass in the target installation area with an alcohol wipe to ensure that no dirt on the glass in this area will affect the adhesion of the mounting bracket and view of the external camera lens. Ensure the glass is dry before mounting.
2) Align the mounting bracket with the connection of the bracket facing down (with the toothed side facing left).
3) Tear off the 3M adhesive film on the bracket and stick the bracket horizontally level on the front windshield. Then press the bracket in place for 10 seconds to ensure there are no bubbles between the bracket and the glass.
Step 3 – Install the camera
Connect
the camera to the bracket with the front side facing inward — with the teeth on
the left side of the bracket engaged with those on the left inner side of the
camera. Tighten the bracket bolt clockwise with a PH2 cross screwdriver. Before
tightening completely, adjust the camera to be as close to vertical as
possible. (Red: Power, Orange-Yellow: Ignition, Black: Ground).
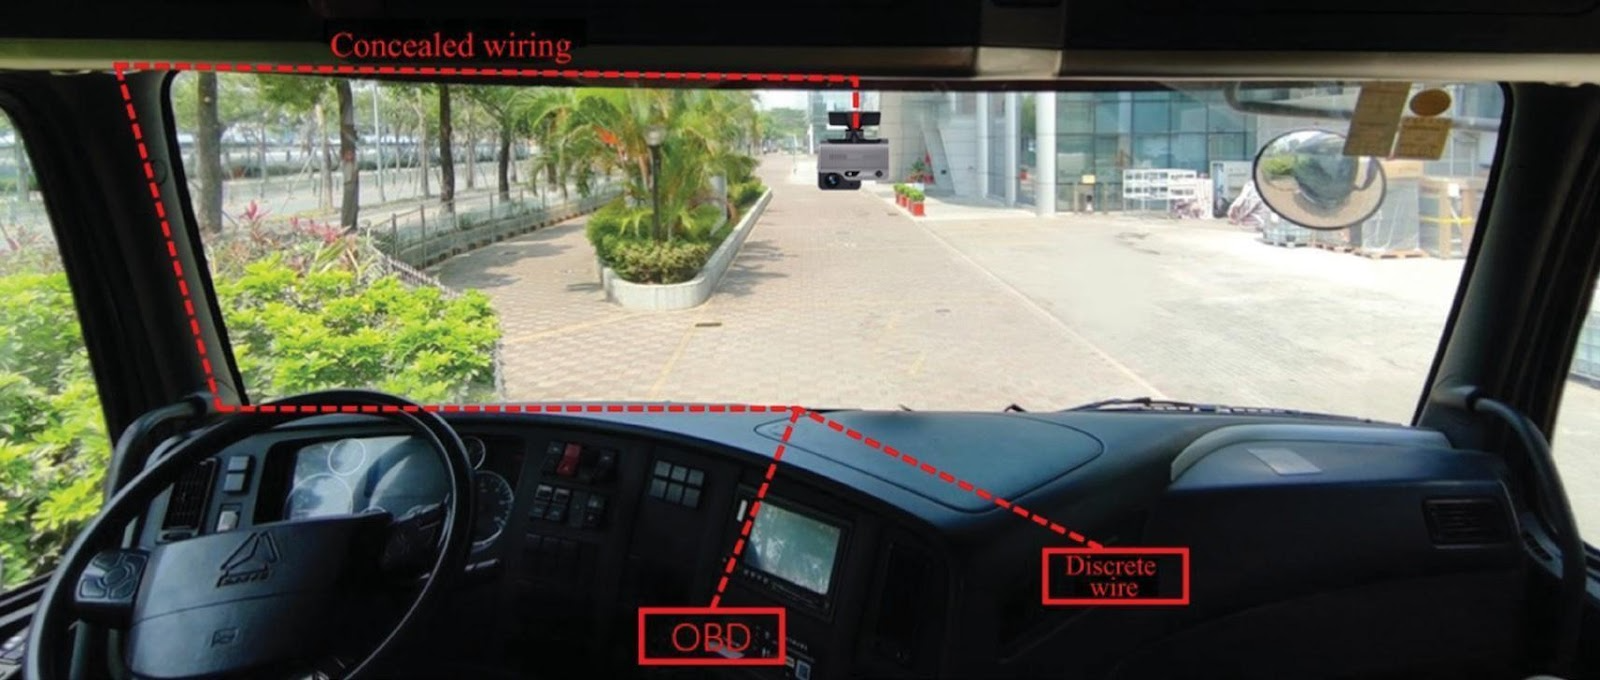
Direct wiring
“cut-in” (included in camera kit)
If the mode of power supply connection
through discrete wire “cut-in” is adopted, connect POWER/ACC/GND with the power
cable of the vehicle, respectively.
Professional installation is highly recommended for this option.
Red Wire With Fuse
to Constant Power +12V DC - +36V DC
Orange Wire
With Fuse to Ignition Signal
Black Wire to Ground
Step 4 – Secure cables
Secure all cables by routing them under the headliner and behind the trim panels or with zip ties and mounting blocks. Securely fasten any cables under the dash up and out of the way of the operator.
Step 5 – Power on camera and validate operation
1) Ensure that all power cables are connected
2) Turn on the vehicle ignition to power up the camera.
3) Wait for at least 2 minutes and verify that the status bar on the camera indicates proper function of the camera (the first icon, Power, is solid green).
NOTE: The four (4) infrared lights surrounding the driver facing camera may also be visible depending on the ambient light conditions inside the vehicle.
Step 6 – Set Up Time Zone & Height Of Camera In Configuration File
1) Download the Veyes app and connect to the camera’s WIFI (STXXXXXXXX) when the camera is turned online
2) Login using the following credentials:
- Address: 192.168.240.1
- Port: 9006
- Username: admin
- Password: admin
3) Access the Preference tab on the top right and expand Basic Setup
4) Access Time Setup under Basic Setup , keep TimeZone setup as GMT and change Local TimeZone to the required field
5) Collapse the Basic Setup tab and expand the Alarm tab
6) Access the AI App tab under Alarm
Step 7 – ADAS Calibration
Access the Algorithm Tab and the following values:
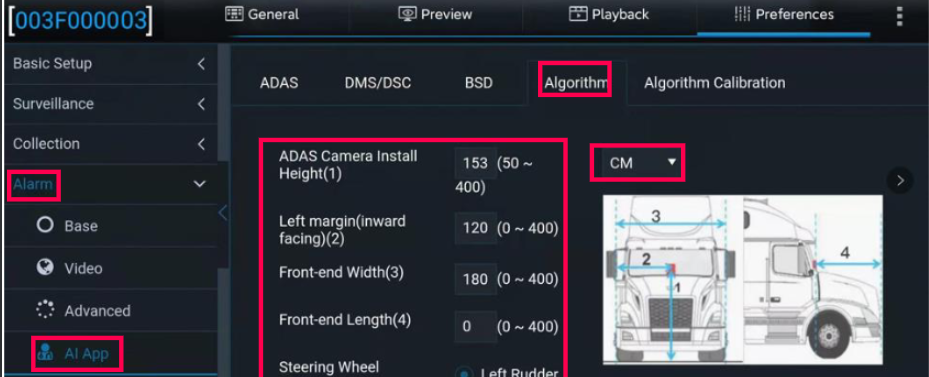
ADAS Camera Install Height: The vertical distance between the road facing lens to the ground
ADAS Camera Left Margin: The horizontal distance between the road facing lens to the left side of the windshield
Front End Width: The width of the nose
Front End Length: The length of the nose
Access the Preview Tab , select the AI Calibration Button:
After clicking on the AI Calibration button, Select ADAS
Select the first channel and click on Calibration button
Confirm that the ADAS is installed at a proper position of the front windshield and within the working range of the wipers, and then tap Next
Confirm the measurements entered in the Algorithm tab and click next and on the page after click next to proceed with the calibration
In the screen after, the camera will automatically calibrate, no need to adjust screen, click on next
In the screen below, enter the speed source as satellite and for turn signals enter source voltage (even if not there) and click Next. Afterwards, a screen will pop up mentioning that no signal is detected, click on complete.