How to create and share a public map using the builder ?
- Navigate to the “Map Builder” link at the top-right of the dashboard
- Click on “Create New Map”

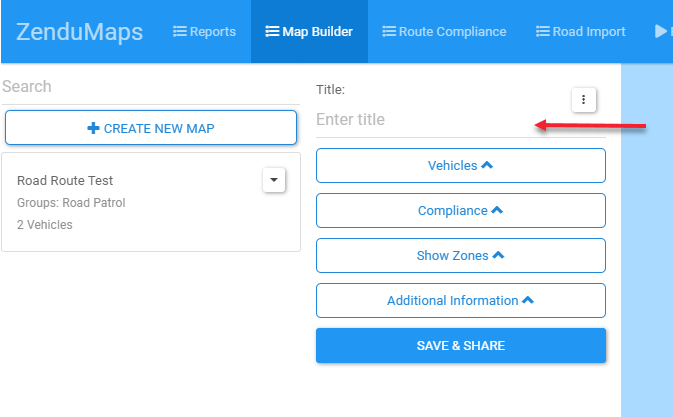
Select a map title.
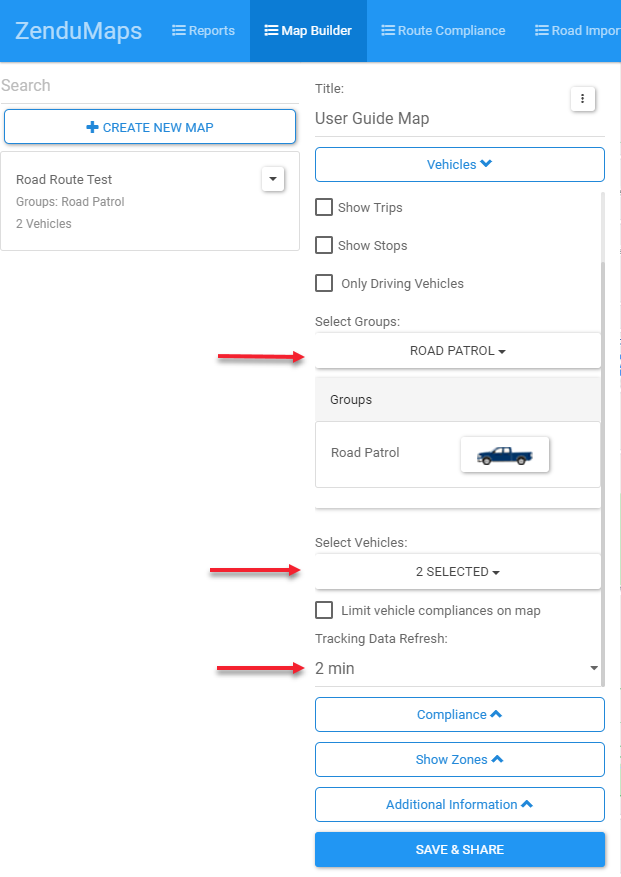
Configure the “vehicle” setting of your choice. The user can customise the map data by showing vehicle labels, icons, trips, stops or only show driving vehicles.

Filter the vehicles to select by choosing the group he would like to show and then the vehicles of choice.
Select the refresh rate for the tracking data
Choose the type and the range of data the user needs to display . The user can select to show historical data or recent live data ( past 2-72 hours ). If the user selects limit compliance between 2 dates this will then show historical data.

NOTE: If the user wants recent tracking (e.g last 24 hours), they should leave the “Limit Compliance between 2 dates” box unchecked.
Select “Use Routes” if the user would like to display the vehicles activity against a created compliance route.
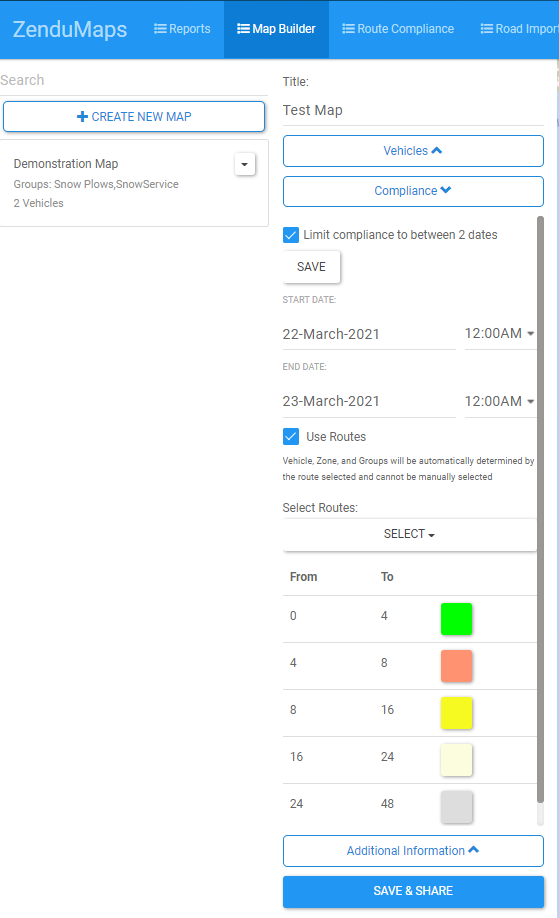
If the use routes option is selected the compliance will be displayed using a serviced (green or selected colours) or not serviced (red colour) reporting style with a completion percentage bar by default. See map example below.

On the other hand “Passage” can be selected instead of “Use Routes” to show trip data for the last selected amount of hours (2 hours to 1 week can be selected and various colours can be chosen). The colours can be based on 1 or 2 road passes, or based on a rule (such as plow down).

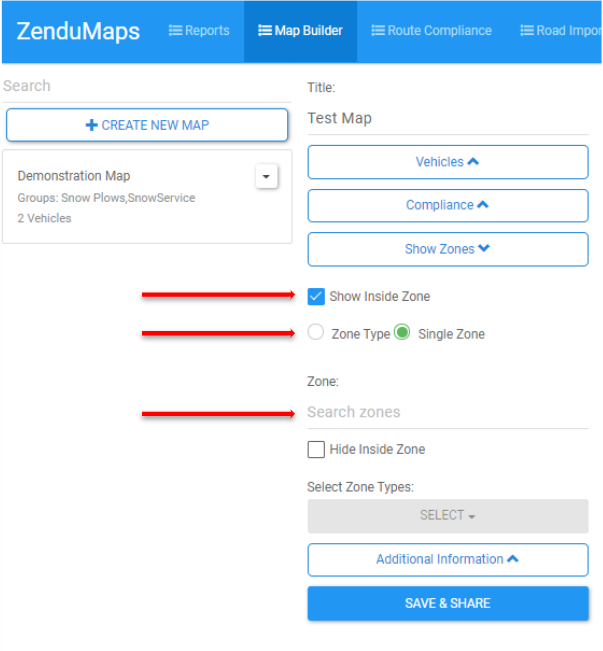
If you are using Passage, you can limit trips on the map by using the “Show Zones” tab. You can select a single zone or a group, and choose to see everything inside the zone, or see everything outside of the zones. These zones can be loaded in Road Import, or created on the geotab map.
The Additional information tab allows the user to add information to the left hand side of the map. Clicking “Edit Board Content” will open an editor for the text to be written. “Show Weather Widget” allows a weather icon to be enabled beside the search bar that can be clicked on. Clicking on this shows the day’s weather. “Public Tooltips” can be enabled to show trip information.
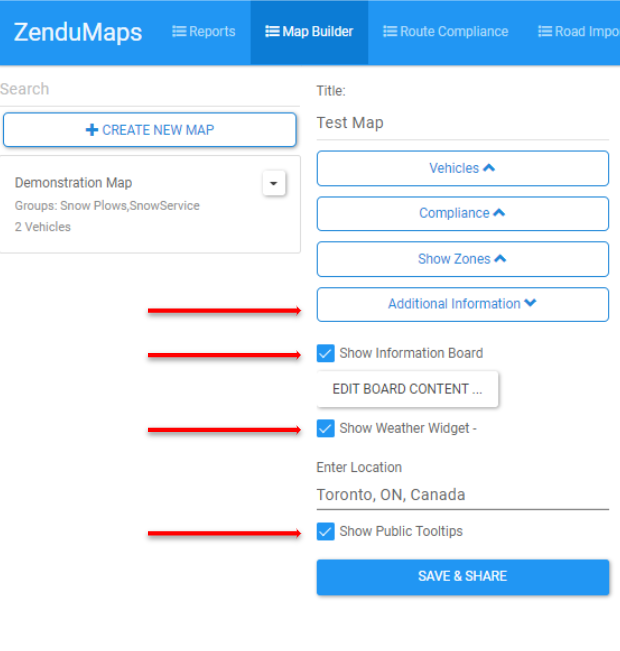
After populating all the fields click on the “Save & Share” button.
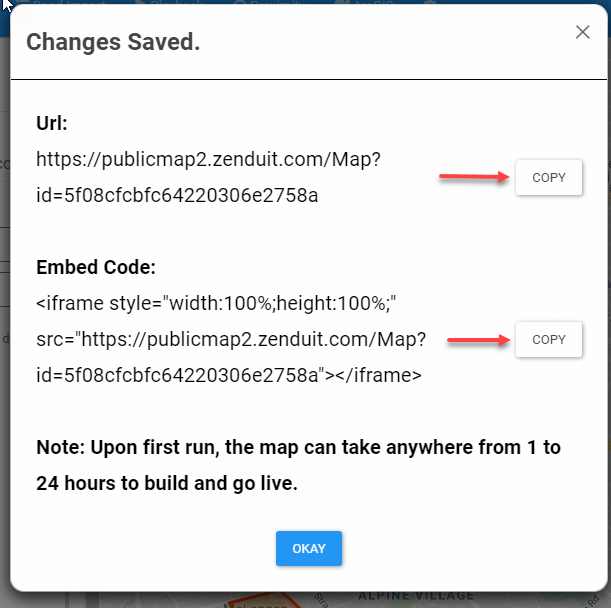
A pop up window will appear with an URL Link and an Embedded Code where the users chooses to copy or embed the link created
Below is an example of what a map can look like with passage tracking

Related Articles
How to use the reports in ZenduMaps ?
This article explains how to use the reports in ZenduMaps. This is a very important aspect of ZenduMaps. The reports section enables one to generate, display, and export valuable information. Some of the valuable information that may be provided are ...How to add Marked Locations in ZenduMaps?
This article explains how to add Marked Locations in ZenduMaps Marked locations are geolocations that will be shown to the drivers when they are navigating through their route. These locations can be special points of interest that you want to keep ...Pair the auxiliary camera over Wifi using the Surfsight View app for Z6
Procedure: To pair auxiliary cameras using the app: Install the Surfsight View app from your app store onto an appropriate device. From the device settings, select the auxiliary camera's WiFi. Auxiliary camera WiFi names appear similar to: ...How to use the shapefile import tool in ZenduMaps ?
This article explains how to use the shapefile import tool in ZenduMaps. This tool enables users to import zones and roads directly from files. There are different types of files that can be supported by this functionality, including shp, dbf, and ...Enabling Hotspot on ZenCAM using ZenduONE Platform
Overview This article provides a step-by-step guide on how to enable a hotspot on a ZenCAM using the ZenduONE platform. The hotspot feature allows you to share the device's data connection with other devices, such as tablets or smartphones, making it ...